Introducing Studio
Everyone should be able to create simple but powerful pages, regardless of their technical know-how or how much time they've spent on our platform.
Studio is the a no-code editor designed to help you do just that: create and edit pages, built on your data, in minutes.
It contains everything you need to take you from creation to publication:
Configure the page information (title, URL, and description) and access policy
Arrange your own page layout using sections and blocks
Within sections, configure the blocks that define the text and other visualizations such as images, charts, maps, or KPIs
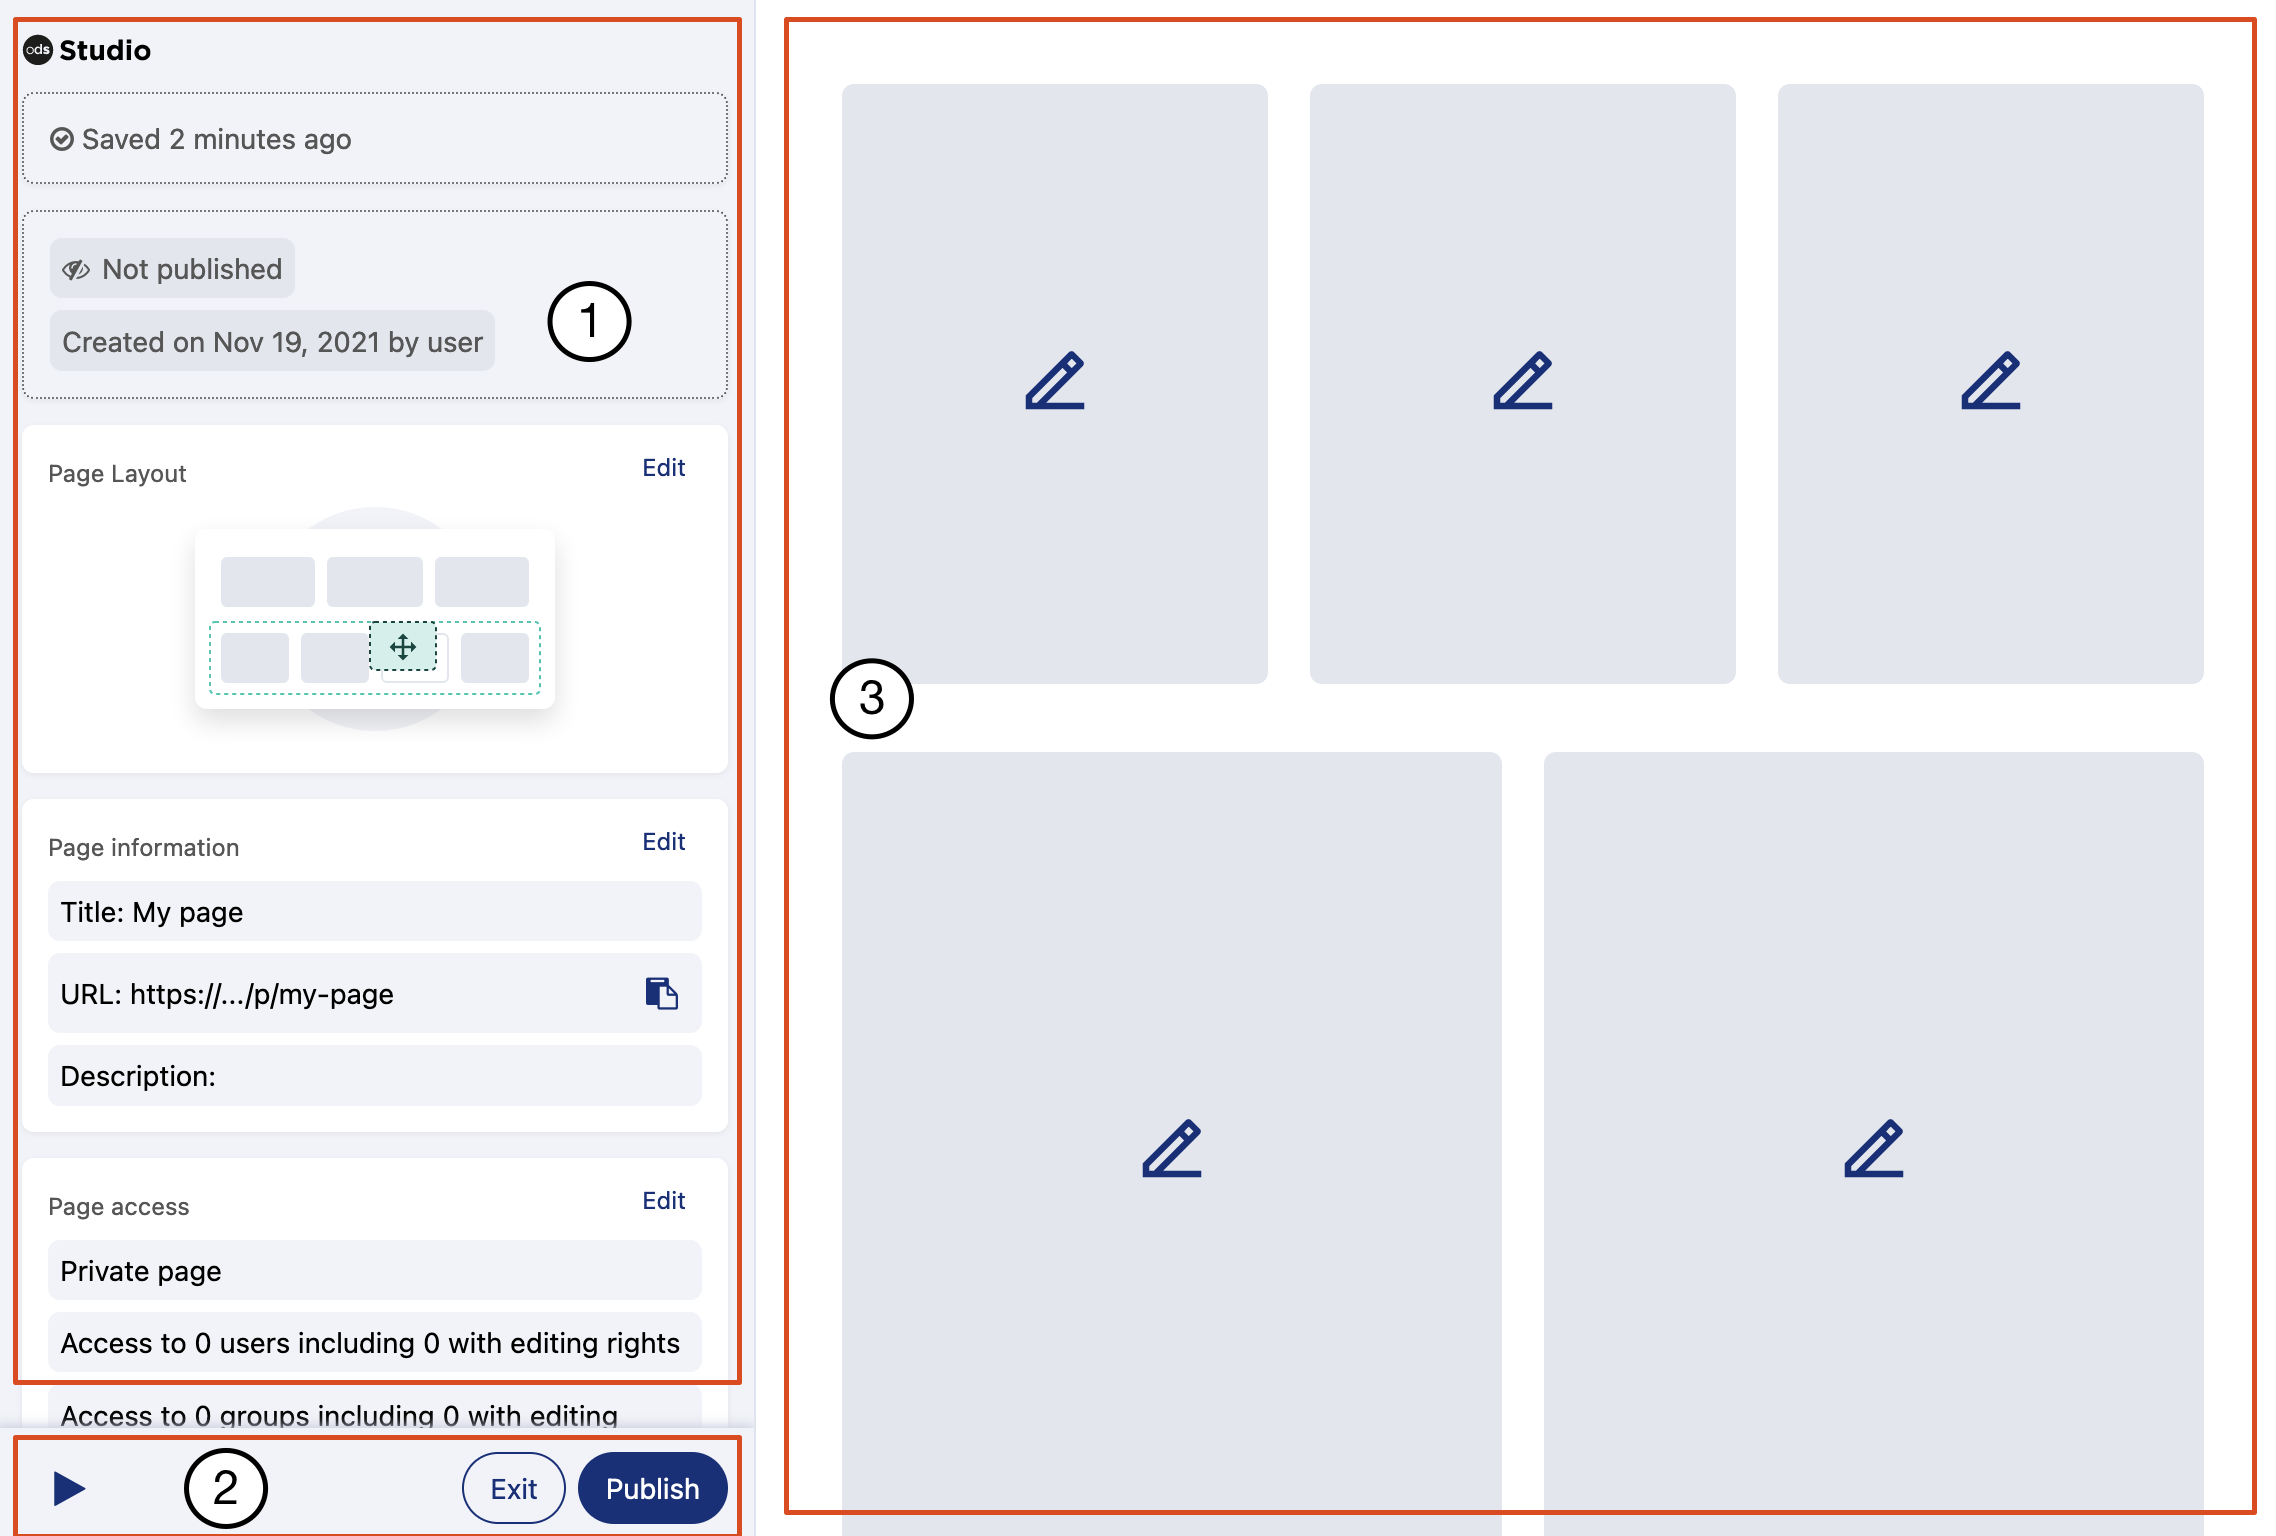
The Studio interface
This section displays properties of the page and components and lets you edit them. Also displays save status and notifications.
This is the toolbar, where you can:
Preview your page
Return to the back office
Publish your page
Here you are shown a live preview of the sections and blocks included in your page. This section also displays a preview of the first 20 records of the input dataset when configuring a visualization.
Page status
Once created, the page status changes according to the actions you perform:
Draft: This tag indicates that you, or another editor, has edited the page without publishing it. The tag appears as soon as you perform one of the following kind of action: edit a block, edit the page layout, add or edit the page information. The tag disappears after you publish the page, and until you edit the page again.
Published: This status means that the page is currently online and anyone with the right access can visit it.
Note that if a change is made to a published page, it remains published but will be tagged "draft." If you want the page to be offline, change it to "not published" or delete the page.
Not published: This status means that the page is not online. By default, a page is not published when you create it; you must explicitly choose to publish it.
You have the possibilty to unpublish your page to take it offline, and in that case the status changes from "Published" to "Not published."
An example of statuses at work:
Paul creates a new page. Creation is the first step of editing, and therefore the page is immediately tagged as a "Draft." As Paul has not published the page yet, its status is "Not published." Once Paul has finished editing the page, he publishes it. The page is now "Published" and the "Draft" tag disappears.
Several months later, Paul comes back to this page because he wants to change a KPI inside it. The page status remains "Published," since it has not been taken offline. However, it is now tagged "Draft" again, because editing the KPI created a new version of the page, which is different from the version currently online. The tag will remain, to remind Paul that the page within Studio is different from the one he previously published. When he clicks on Publish again, the previously published version will be replaced and the "Draft" tag will disappear.
Two years later, the page has become obsolete. Paul decides to unpublish it. The page now has a "Not published" status, as well as any "Draft" tag.
There is no page versioning in Studio. As such, the following actions are irreversible:– After you delete a page, it cannot be recovered.– If you publish a page that already has the "Published" status, the new published version will replace the previous one.
Learn more
Now that you're situated, you can explore the tools Studio has available:
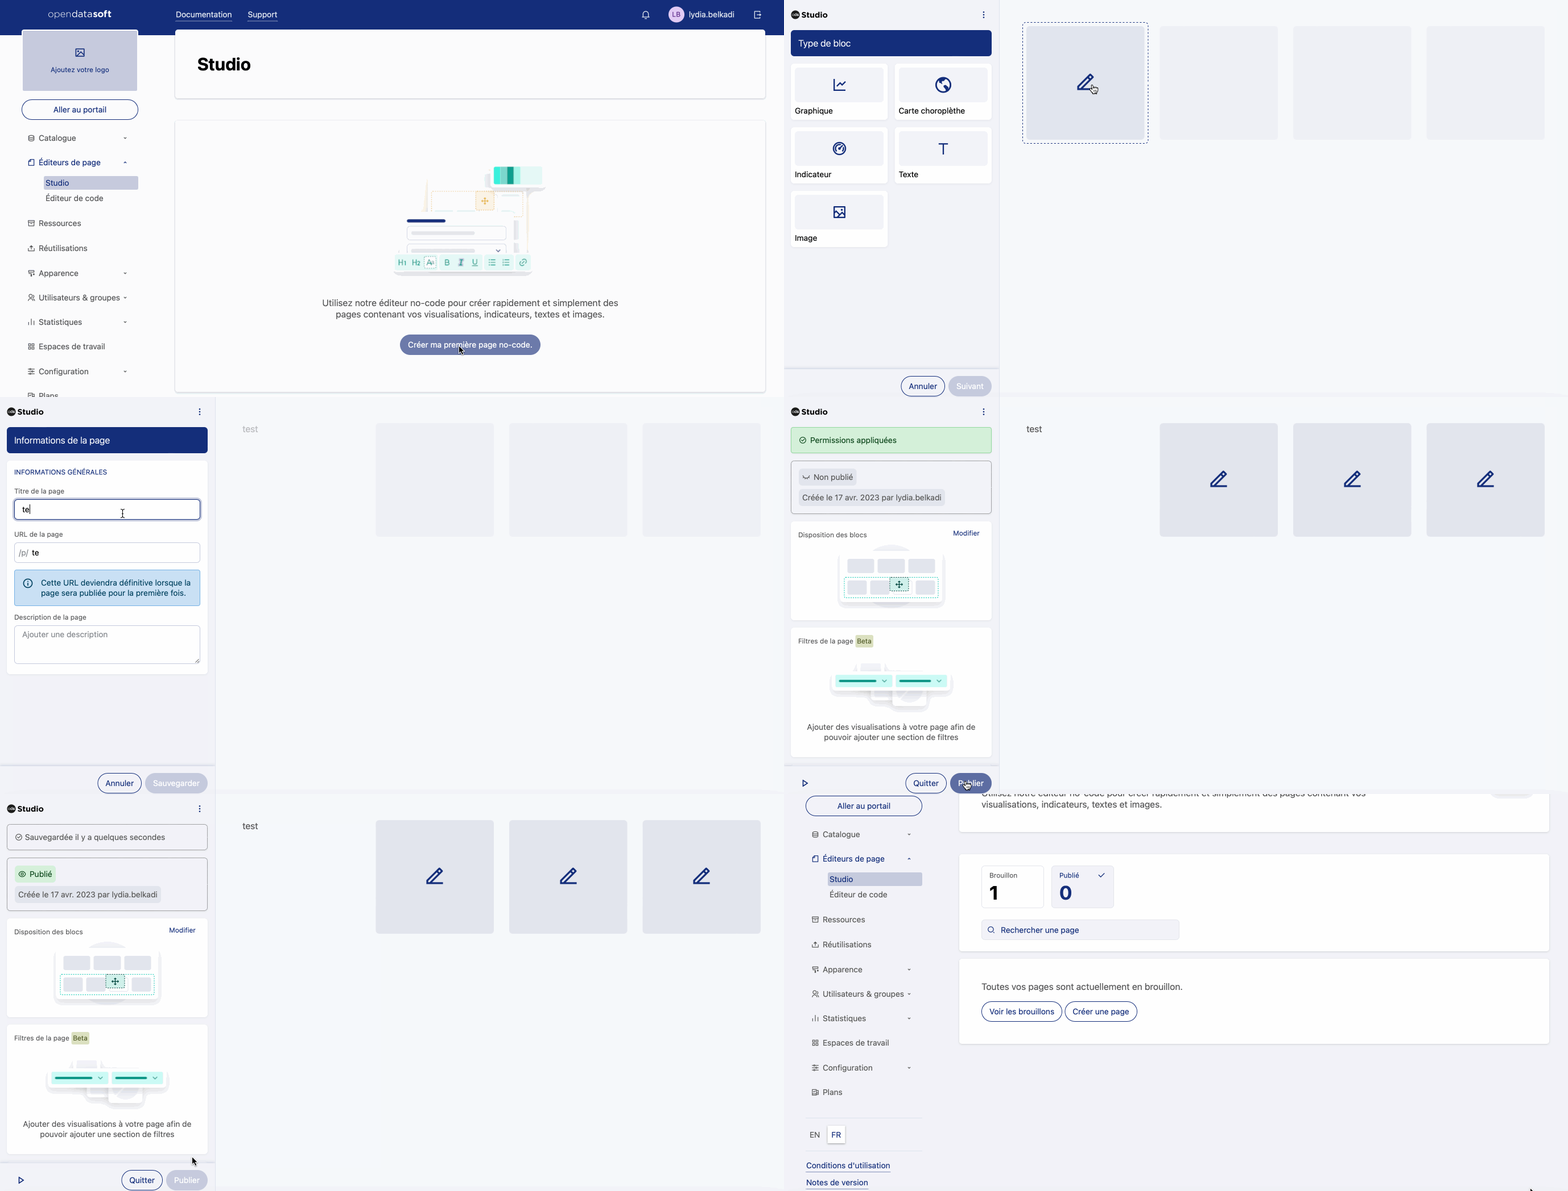
Create a page by clicking the button Create an asset and selecting "Studio page."
Edit the page layout by opening the layout editor, where you can add sections, add blocks and rearrange elements.
Configure blocks that contain editable content. There are five types of blocks available in Studio: chart, map, kpi, text, image.
Configure page information, such as the page title, URL, and description.
Manage the access to a page, that can be public or private, by setting an access policy. You can also add or remove users and groups from a page, and grant or remove editing rights.
Preview a page is a function that helps you test your page before publishing it, just by opening the page as a preview.
Publish a page to make it available on your portal. It can be published from a preview, from Studio, or the list of pages where you can also unpublish it.


