
Managing groups
Groups are a simple way to share security settings between users. As you would for an individual user, you can assign permissions and a quota to a group.
For example, if you have a particular team in your organization that needs the same permissions, you can assign the people in that team to a group with those permissions, rather than assigning them to each person individually.
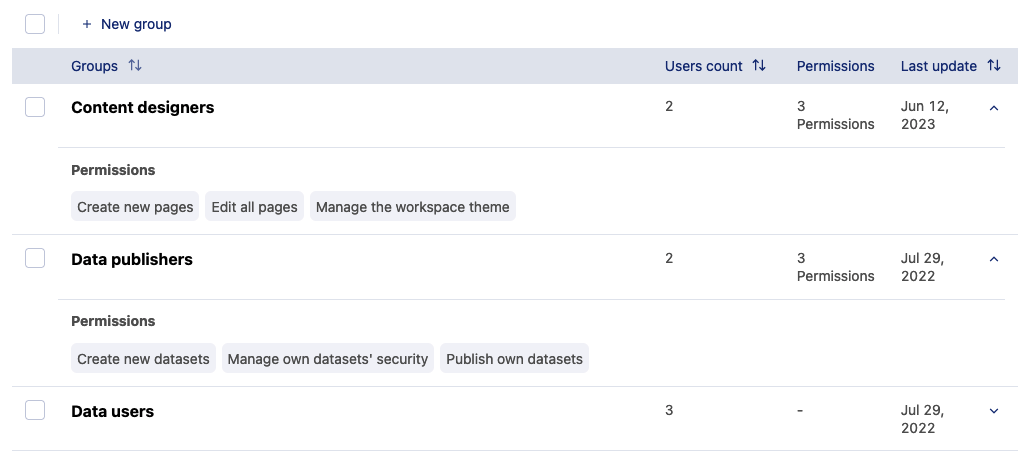
From the list of groups, you can delete, modify, or create new groups, and can quickly see the number of members in each group, as well as what permissions each group has.
How to create a group
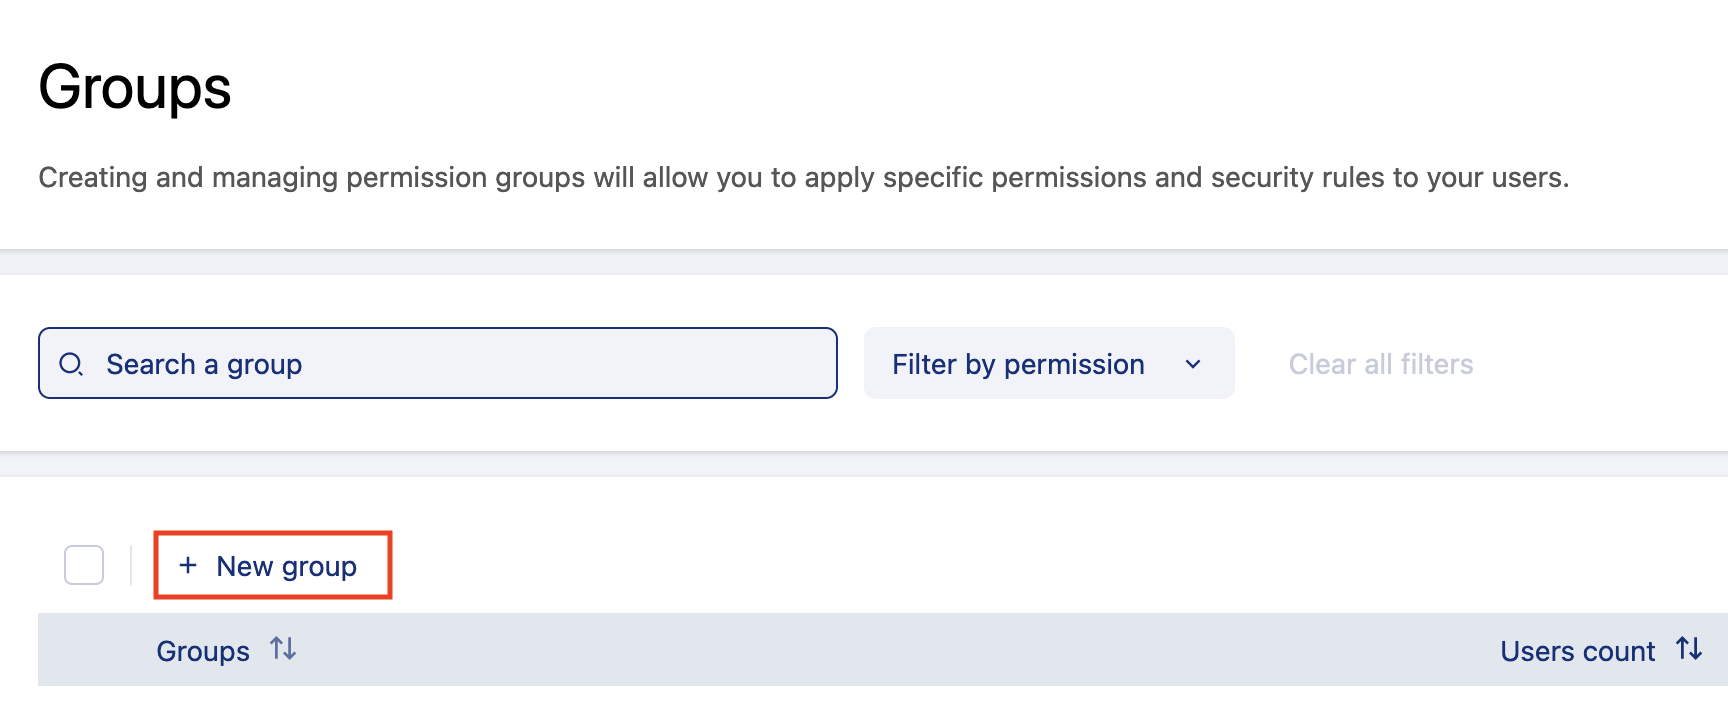
From the back office, go to Users & Groups > Groups
Click + New group
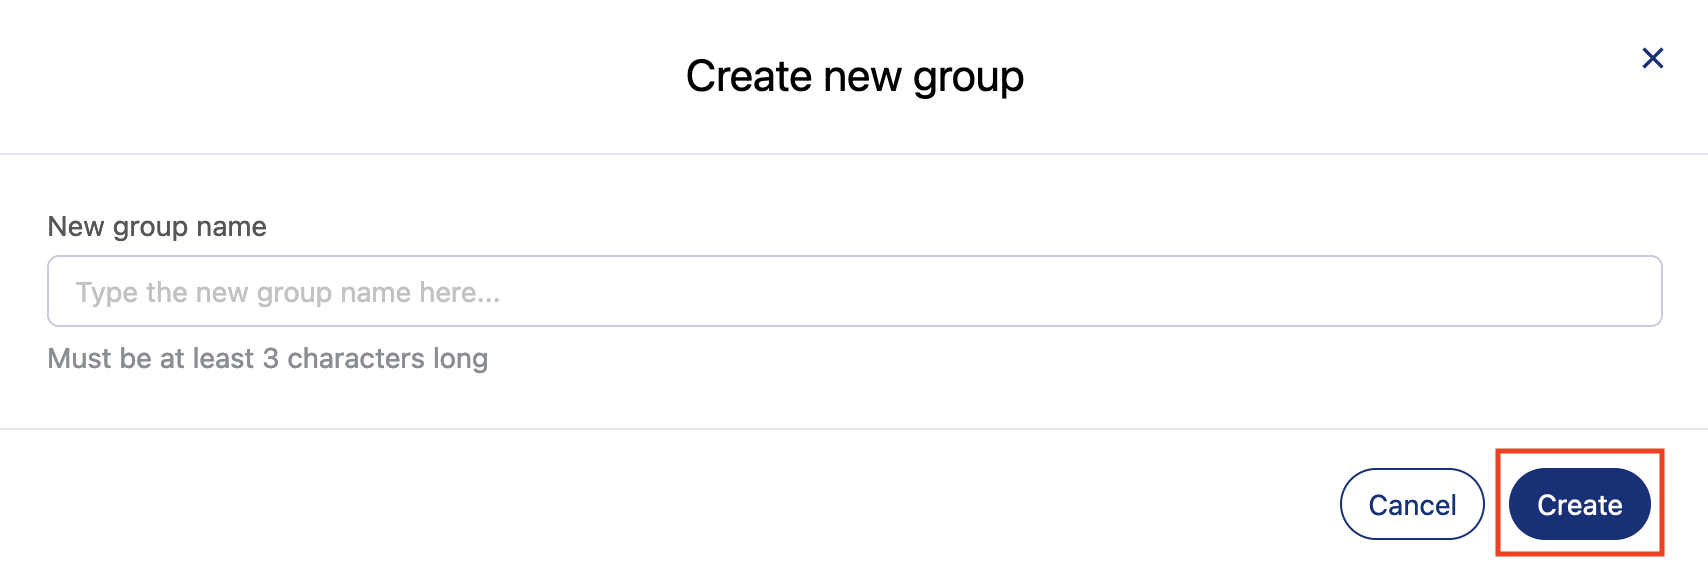
Name the group and click the Create button
Note that it is not possible to create sub-groups.
Modifying a group
Note that at any time you can:
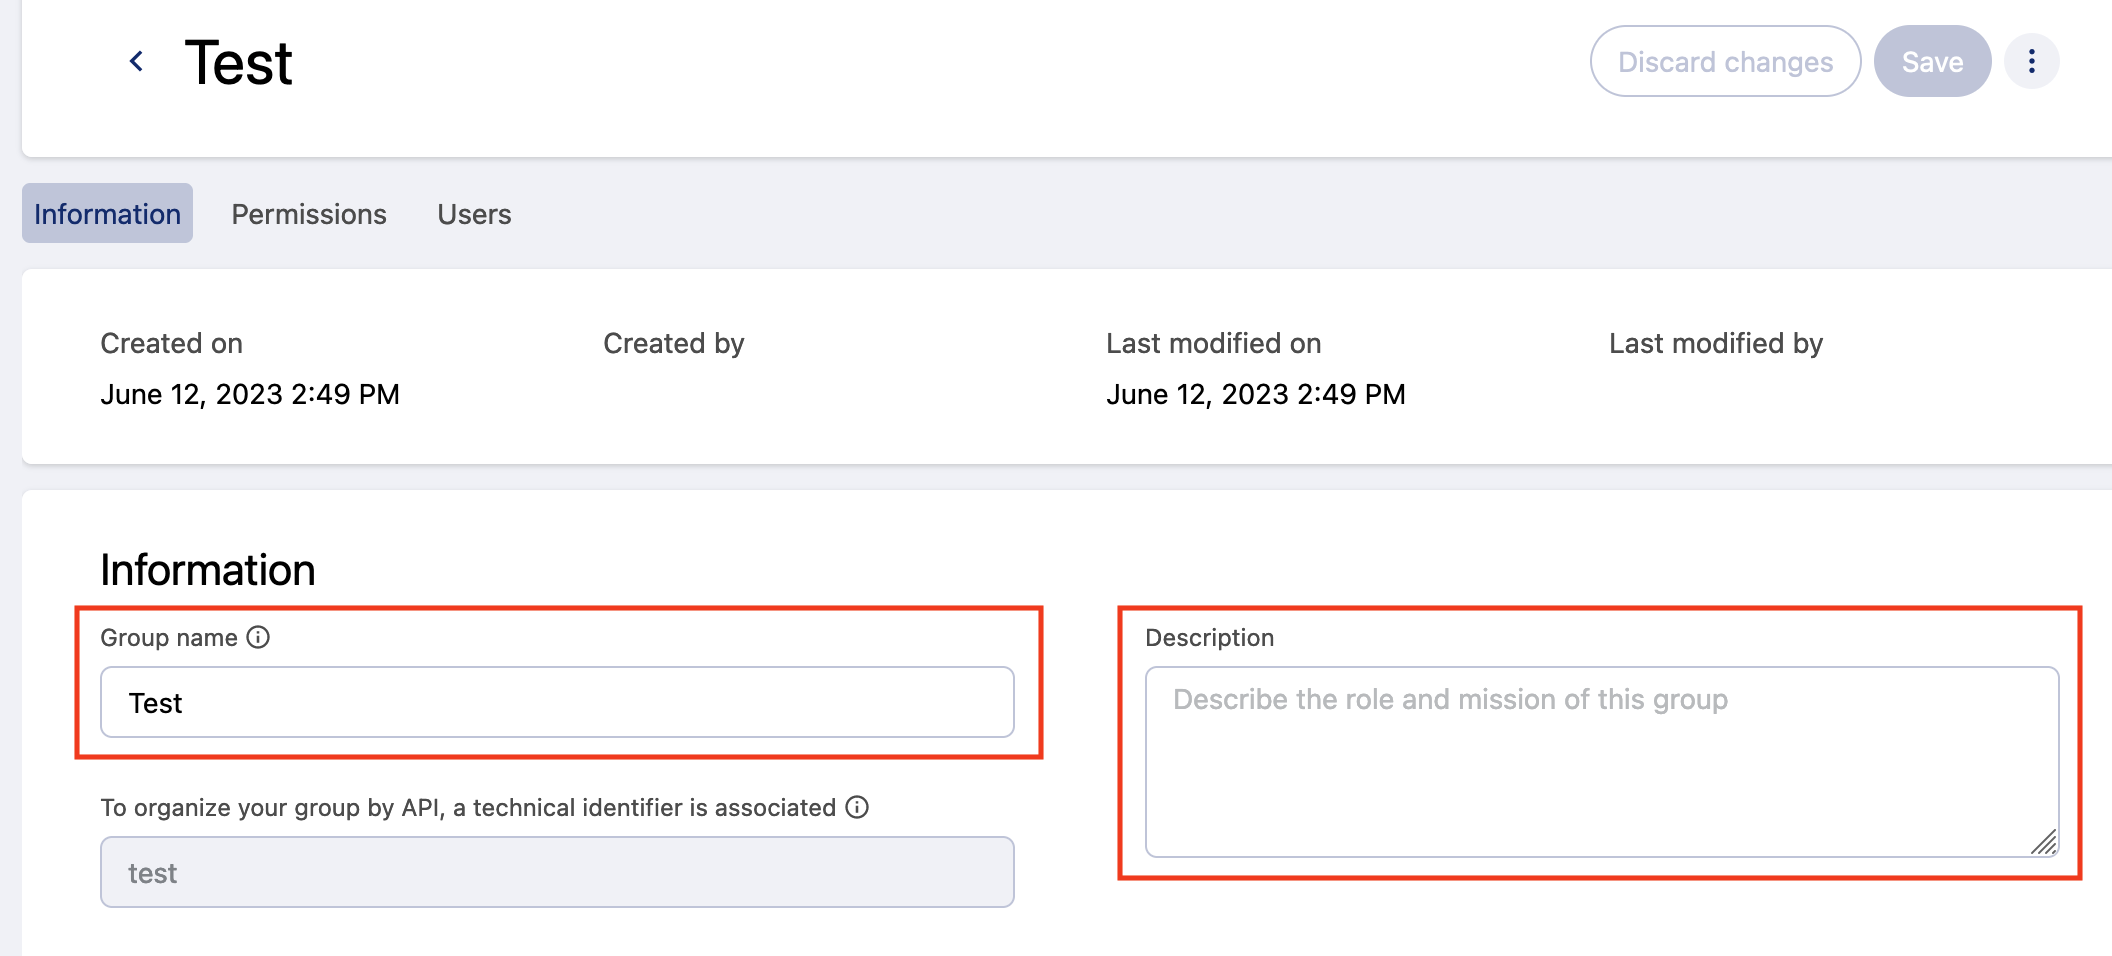
Editing a group's name and description
You can always modify an existing group's name, and add or modify a description.
Restricting a group's quota of API calls
Here you can restrict the number of API calls able to be made by the members of a group.
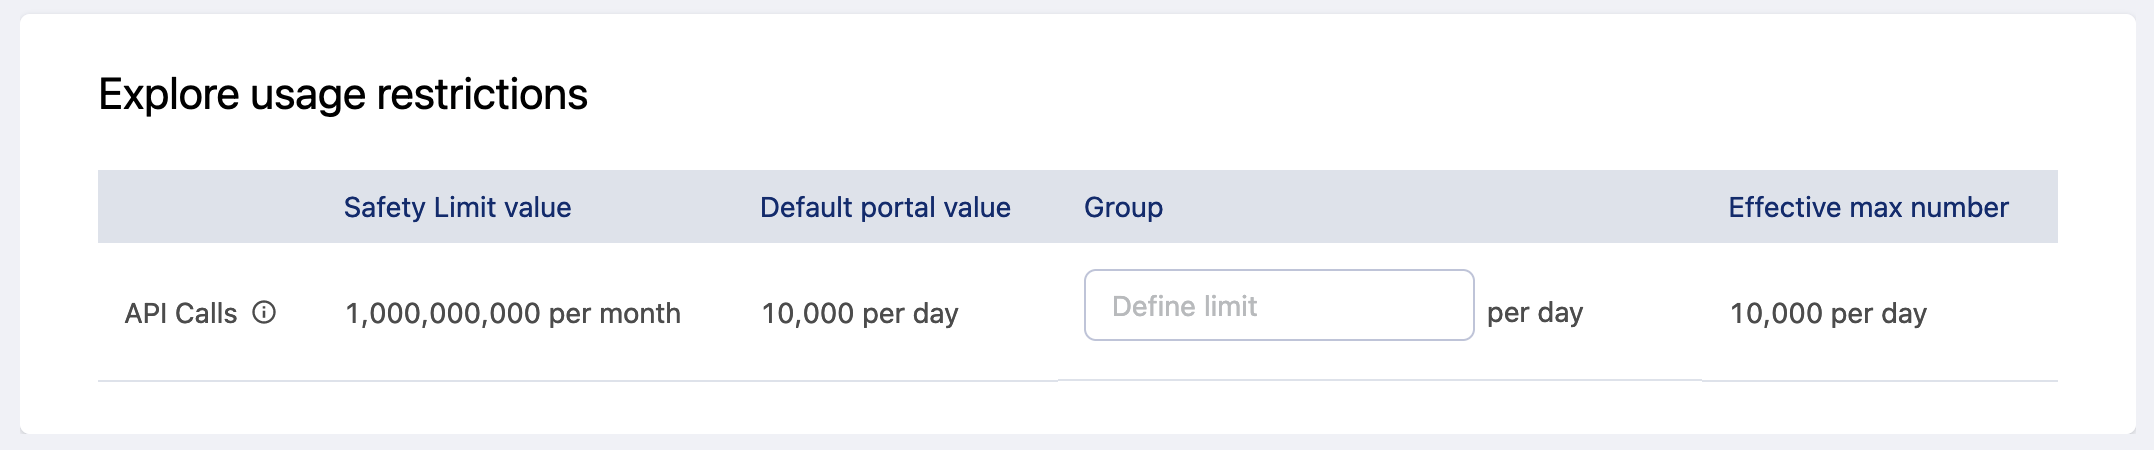
Remember that for any given user, their quotas are determined as follows: If there is a user-level defined value, this value is used. If no user-level value is defined, but the user belongs to groups with those values, the maximum of all of the user's groups' values is used. Otherwise, the default value for the workspace is used. Naturally, a user's quota can never exceed the value allowed by your plan.
Adding or removing permissions provided by a group
In general, there is no hierarchy among permissions. However, note that by definition the "Edit domain properties" permission is for admins only, as it gives you access to users and groups menu, which allows you to give yourself other permissions.
To edit the permissions provided by a group, click on the pencil icon to go to the group's Permissions tab. The permissions are grouped by their function. You can toggle an entire group on and off, or else click See specific permissions to expand the group, and toggle one or more individual permissions.

When you're done adding or removing permissions, remember to click Save in the upper right.
Note that individual group members inherit any additional permissions they are given through a group. A user's permissions are therefore the addition of their own permissions and of the permissions granted through the groups to which they belong.
Adding or removing users from a group

To edit a group's list of users, click on the pencil icon to go to the group's Users tab. Click + Add user. In the window that opens, find and select the users you wish to add, then click the Add users button in the lower-right corner.
You can add or remove users individually or in bulk. You can also directly invite new users.
To remove users, either click the trash can icon that appears on the right when you roll over a user, or else remove users in bulk using the tickboxes and the trash can icon that appears at the top of the list.
Finally, after making any changes always remember to click the Save button in the upper-right!
You can also add or remove a user directly from their user page. On the Users page, click on the Manage user groups icon for the user in question, select the relevant groups from the list, and click Save changes. For general information about inviting users, see Inviting users to the portal or the page about Managing users.