
Mapping your directory to groups in Opendatasoft (with SSO)
The availability of this feature depends on your workspace's license or plan.
Opendatasoft allows access to your workspace to be managed through a single sign-on (SSO) authentication solution, and currently supports the OpenID Connect and SAML protocols.
Opendatasoft allows you to map the relationship between your company's SSO user groups and your user groups in Opendatasoft. This way, your users will automatically be assigned to their appropriate Opendatasoft groups and have the permissions associated with those groups.
The instructions below detail how, for each group in your workspace, you can define automatic membership based on whichever attributes are relevant—anyone in your marketing department, or instead just marketing managers, all managers regardless of department, all IT department admins, or perhaps only people who are both a manager and part of the IT department, etc.
Note that to configure this feature you must:
Be one of your workspace's adminstators
Have SSO functionality as part of your licence or plan
Have reached out to request activation of OpenID and/or SAML on your plan
Where to start—creating a new mapping
To start, go to Access > SSO, where once they're activated you should see tabs for SAML or OpenID Connect. In the examples here, we'll use OpenID, but the same applies for SAML as well.
There, activate the toggle next to "Allow access for OpenID Connect users."
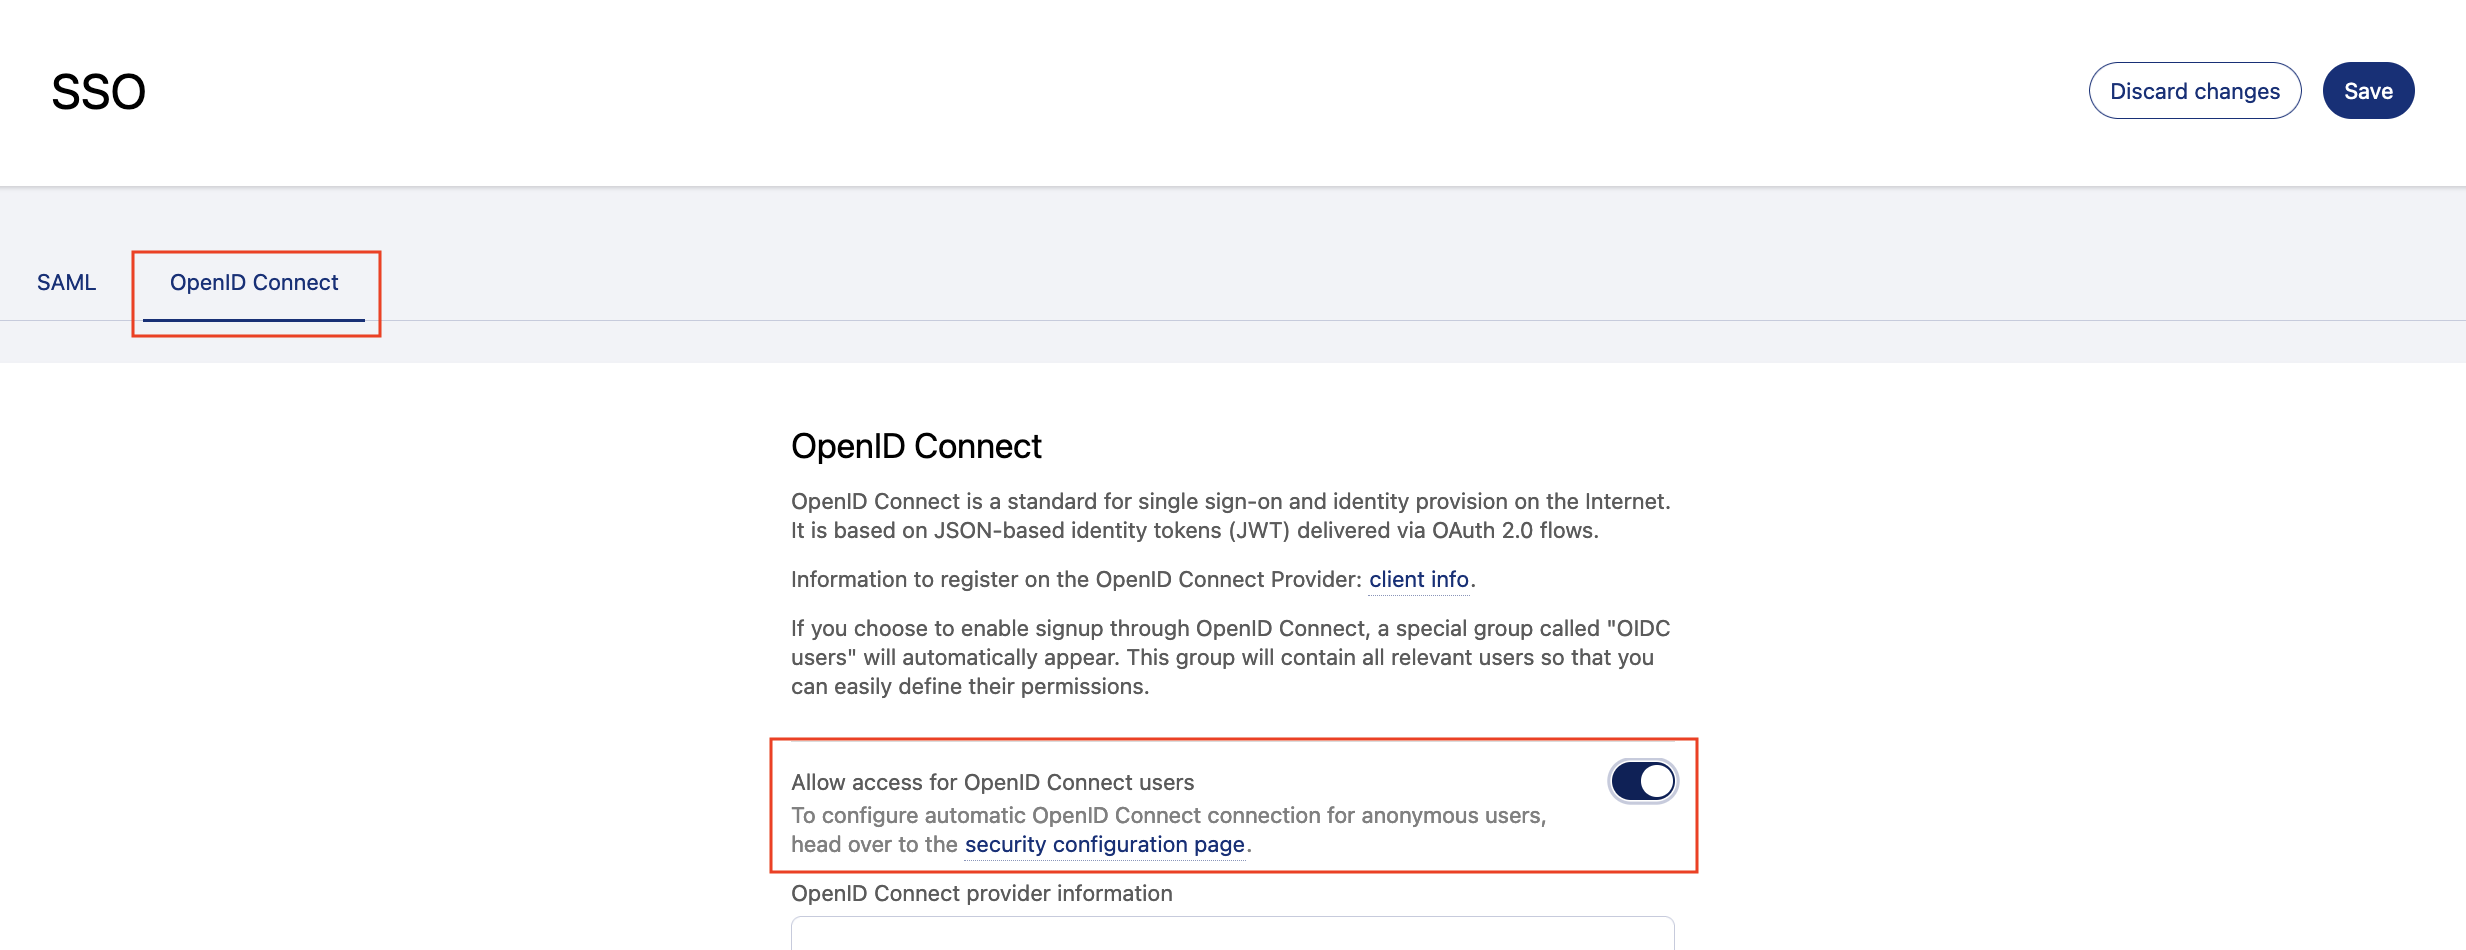
Then, scroll to the bottom of the tab, under "ODS Group Mapping."
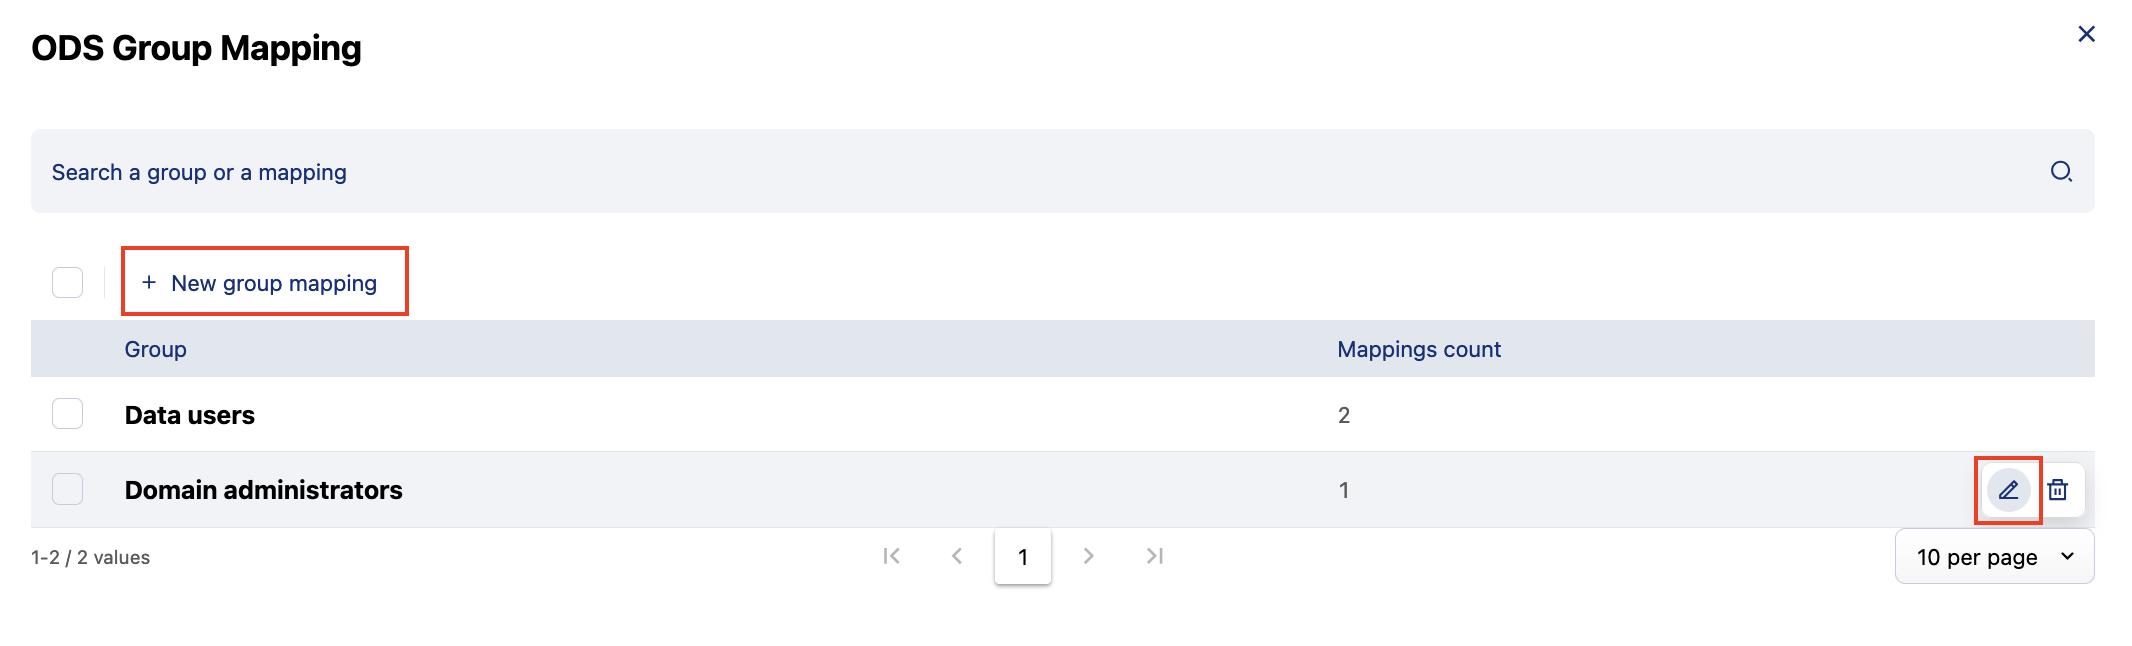
In the example here, there are already mappings for two groups, but this is where you should go to create new mappings or edit existing mappings.

Click on the Edit button to the right.
This will open the interface in which you create and edit all of your mappings. To create a new mapping, click "+ New group mapping." To edit an existing mapping, roll over it and click then pencil icon.
Note that the claims used to map groups must be defined in the OpenID configuration interface. See points 7 and 8 here, “List optional additional scopes” and “List optional additional claims.”
Don't forget to click Finish when you're done editing to record your modifications.
Configuring a mapping
New group mapping
Once you've clicked the New group mapping button, the window will prompt you to select a group from your Opendatasoft workspace. Select the group you'd like to map.

If you add descriptions to your groups, you'll be able to see them here. This may help you when creating your mappings. Note that groups for which a mapping has already been made are grayed out and can't be selected. To edit those, select them from the list on the previous screen.
Adding keys and values
Keys and values correspond to "attributes" in the SAML protocol, and "claims" in OpenID, and are how you configure the mapping.
Keys are unique, and keys and values are cumulative
Note that the same key cannot be used twice in the same mapping.
Especially, it's important to note that keys and values are cumulative. In other words, the criteria are restrictive and not additive. If you map membership to a group based on two keys, only a user that corresponds to both keys will qualify. And if multiple values are specified for a key, that user would need to correspond to all of the values to be included.
Alternately, if no value is provided, all values will be assumed.
An example
In the example here, we're mapping for a "Domain administrators" group in Opendatasoft.
Let's imagine we want to give membership to the "Domain administrators" group to the support managers in our company's IT departments in Europe and in the United States, but not in Asia. And finally, we want the Chief Operating Officer, or COO, to have access as well. This would look something like this:
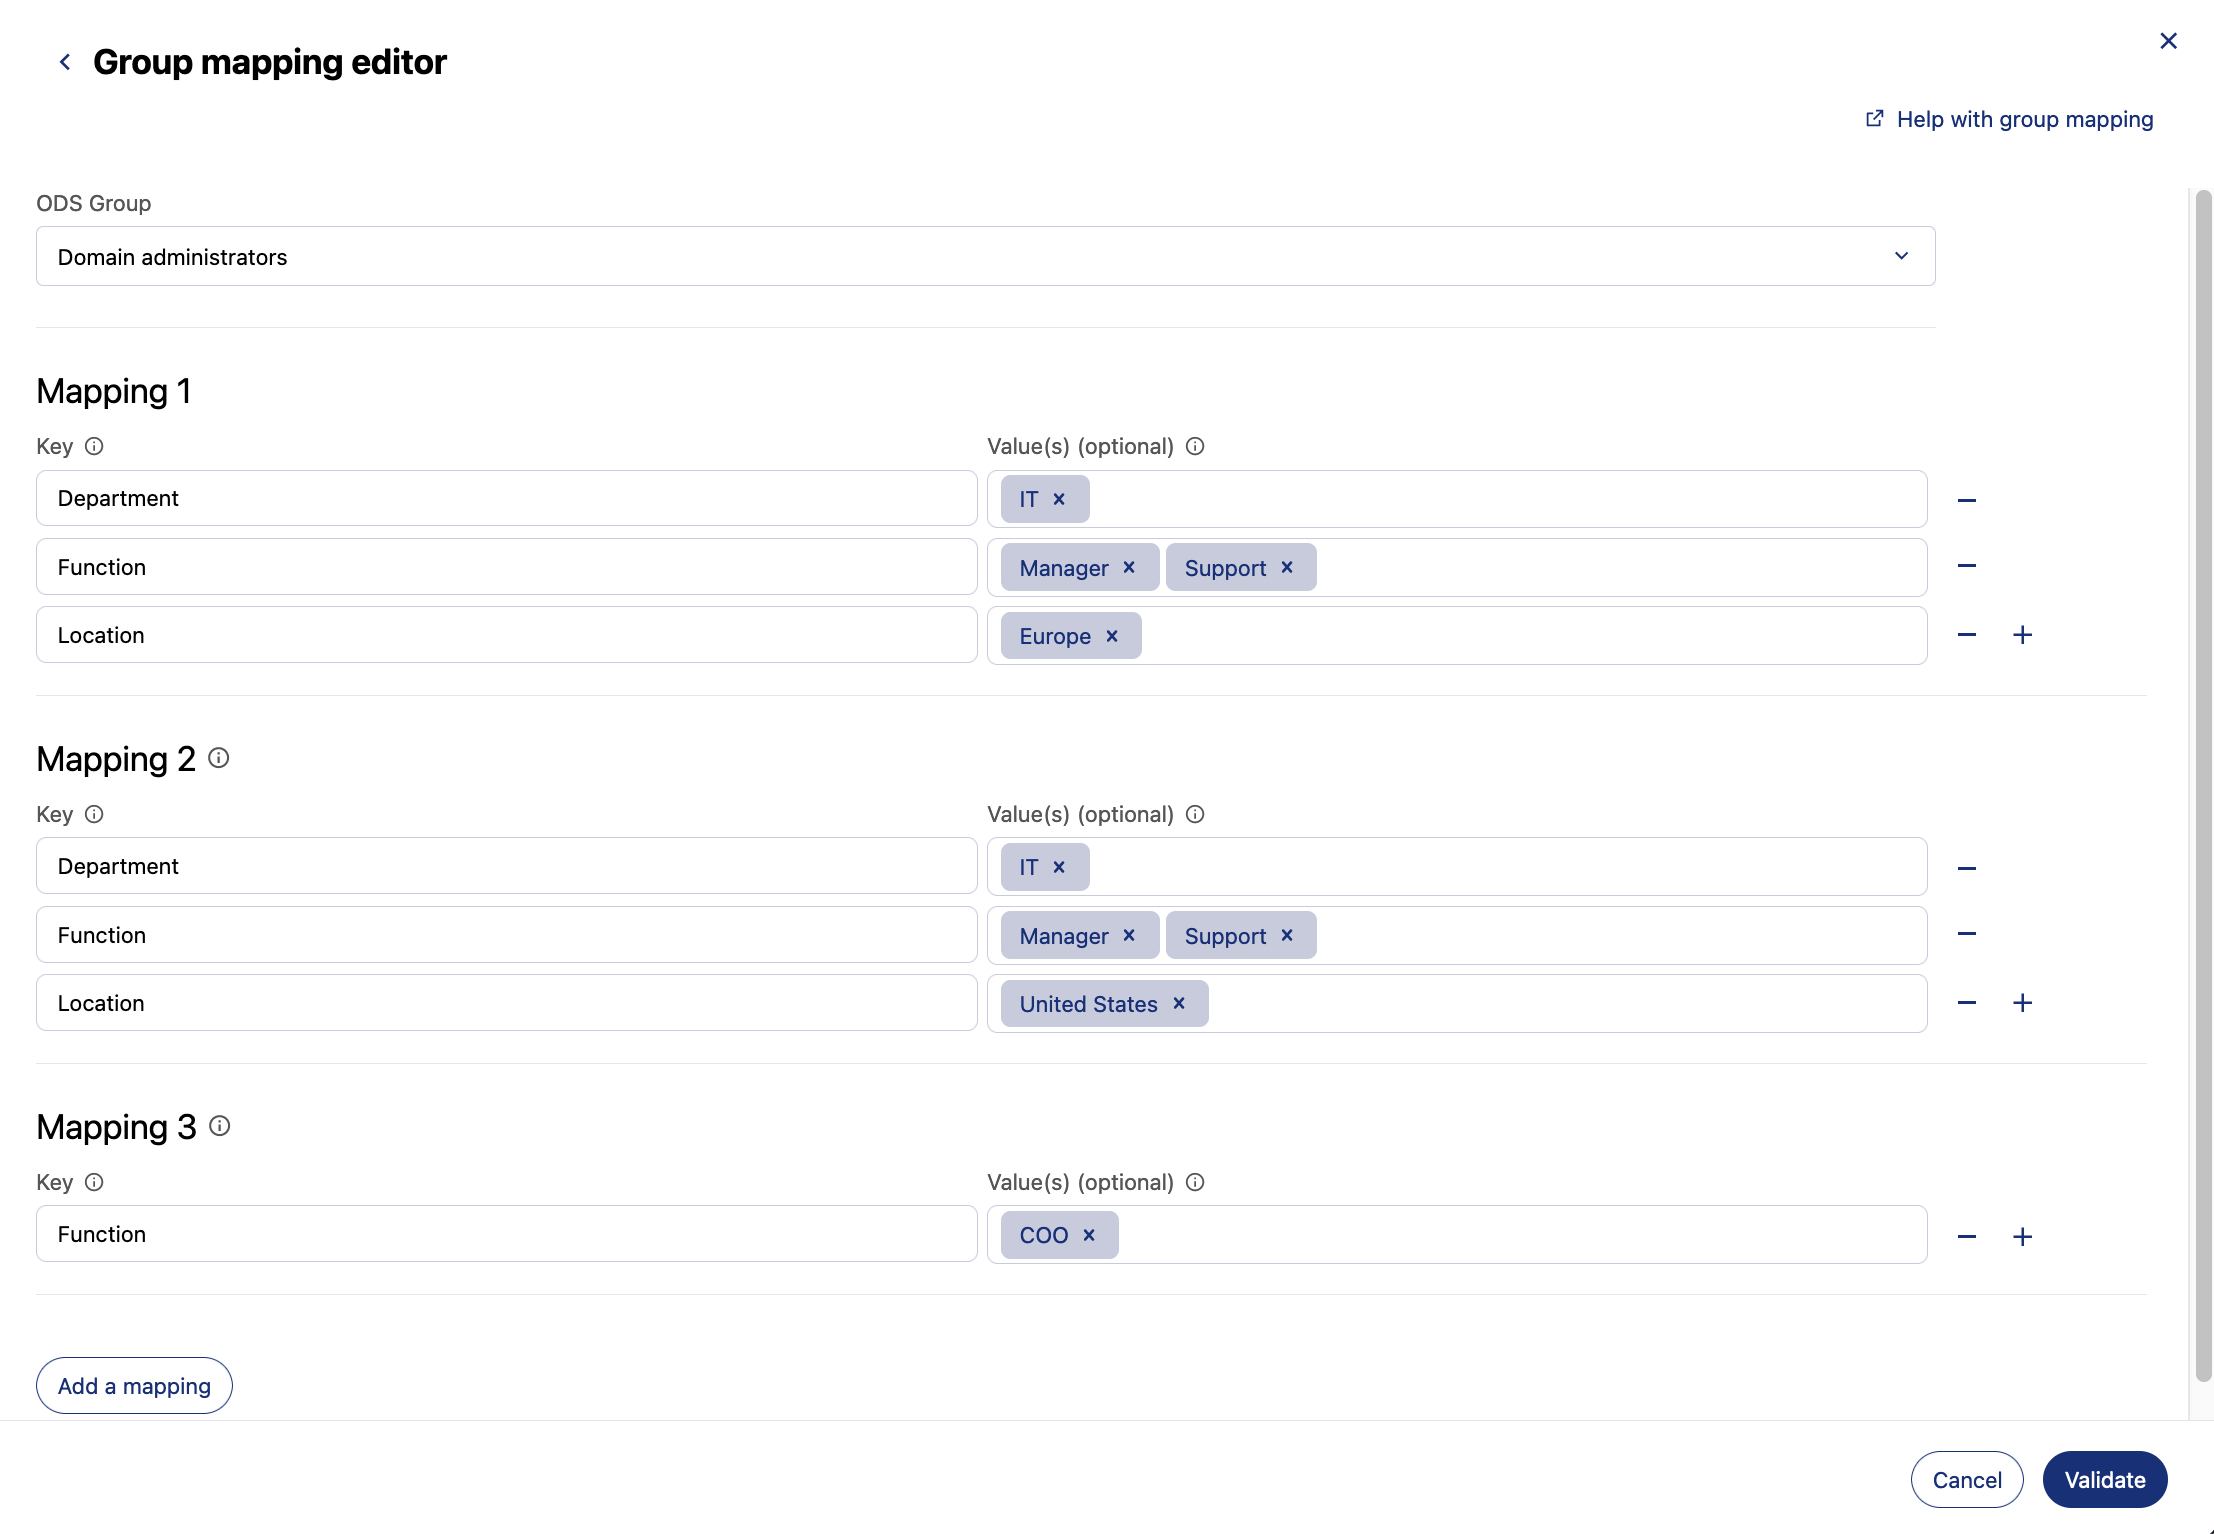
Mapping 1 gives membership to the "Domain administrators" group to the IT department, but only to IT users who are both part of the support team and are managers. Finally, we've limited membership to Europe.
Mapping 2 provides the same access to the IT support managers in the United States.
Remember that keys and values are restrictive or cumulative. So if you added "United States" to the location values in Mapping 1, this would limit the membership provided to users who are part of the European team and part of the American team. In our imaginary example these are separate teams, meaning that this would select exactly zero users.
And since within a mapping, keys are unique, so you can't simply add a second "Location" key to Mapping 1. Instead, you must create a second mapping, identical to the first except for the different location criteria.
Finally, Mapping 3 provides this access directly to the COO. There is no need to specify their department or location, for example, since there's only one COO.
Avoid mixing manual and automatic group management
Once you have mapped your groups, your users will automatically be given group membership through the SSO. Keep in mind, however, that users can still be given group membership manually.
As such, for users or groups whose memberships are managed through SSO, you should remove any existing manual assignments.
Alternately, if for a given user you provide membership to a group through the SSO, manually removing them from that group will not remove their membership, as membership is still being provided by the SSO.
In short, avoid mixing methods of providing group memberships.