Sharing and moderating your data collection forms
This feature is an add-on and is not available by default in your Opendatasoft plan.
Once you have access to the Data Collection Form feature, have configured the feature in Opendatasoft, and have created your first forms on your contribuer.io account, you can finally share your forms and moderate their contributions. Here's how.
Sharing the form with contributors
Forms can be shared with anyone you like by sending them the link or QR code for the form. Anyone with that link can contribute. Click on on Share form.
This will open a page from where you can copy the URL or QR code to give to your contributors.
Moderating and managing contributions
Data Collection Form allows you to review all contributions before they are added to their dataset.
Note that you can approve or delete these results in bulk by clicking on the buttons Approve all contributions found or Delete all posts found.
In cases where you allow contributions to be updated, you can review those updates. And if for any reason the form is updated or modified after contributions have been made, you are able to review and update those contributions in light of the changes.
Note that you can always search for specific contributions using the search field on the left-hand side of the page. This will act like a filter, and you will see only the results matching your search.
Reviewing contributions
Go to the form where you want to review the contributions. By default, the Submissions tab should open with the contribution to be approved filter already selected on the left-hand side. The number of contributions awaiting approval is shown in the small circle.
Pending contributions can be managed individually or all at once. To approve an individual contribution click the check mark icon, to modify it click the pencil icon, and to delete it click the x icon. To approve or delete all contributions at once, click on Approve all these contributions or Delete all contributions to be approved, respectively.
Modifying existing contributions
If you added the "Edit link" technical question to your form, once a contribution has been approved, it will have a link corresponding to it. You can use this link to make that data able to be updated. For example, if you are using the data to make a map of local pharmacies with their opening hours, these links could be included for each entry on the map to allow the hours to be updated if necessary.
Naturally, once they're submitted, updated contributions must be reviewed again.
Updating the contribution
When the contributor opens the link, they will see the form with their answers already filled out, and a label in the upper-right-hand corner indicating that an update has been requested. Once they have modified their contribution, they can resubmit the form.
Reviewing the update
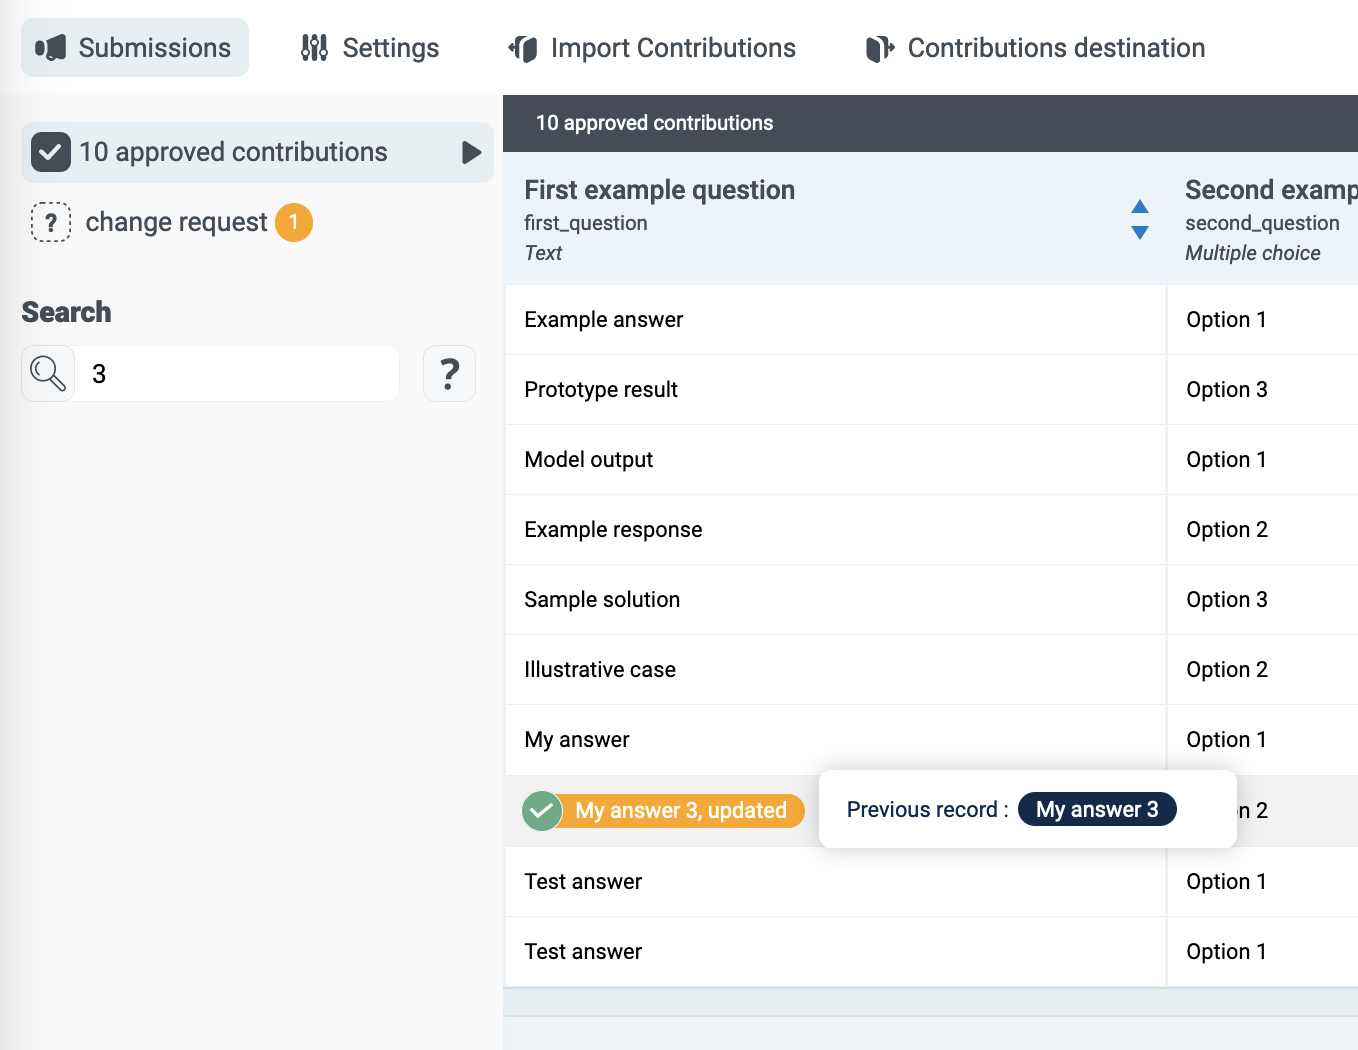
Once the contributor has updated their contribution, you can find it under change request in the left-hand menu. The number of updated contributions awaiting approval is shown in the small circle. Each line represents a form, even if multiple changes were made to the same form.
Click on the eye icon to see a summary of the changes. A pop-up will show you the previous and new answers in each case, along with when the changes were made. You can click on the check mark icon to accept the change, the x icon to refuse it, or the pencil icon to modify it.
Alternately, you can simply roll over the updated contribution, in yellow. There you can see the updated and previous answer indicated. Roll over and click on the green check mark to approve the appropriate answer.
Reviewing contributions when the format of a question has been updated
You may need to modify the format of a question even though you have already begun receiving contributions. In that case, you are in fact able to make that change for future contributions, and then review and possibly rectify the contributions you already received.
For example, if you asked for a date but mistakenly provided a text field, you can still rectify those responses. This ability can be a powerful tool to help you ensure a form and its data are correct and properly formatted, even once a form has begun being used.
Once the change has been made, on the Submissions tab, all contributions that don't correspond to the new format will be highlighted in orange.
If necessary, you can delete each contribution by clicking on the small orange x icon.
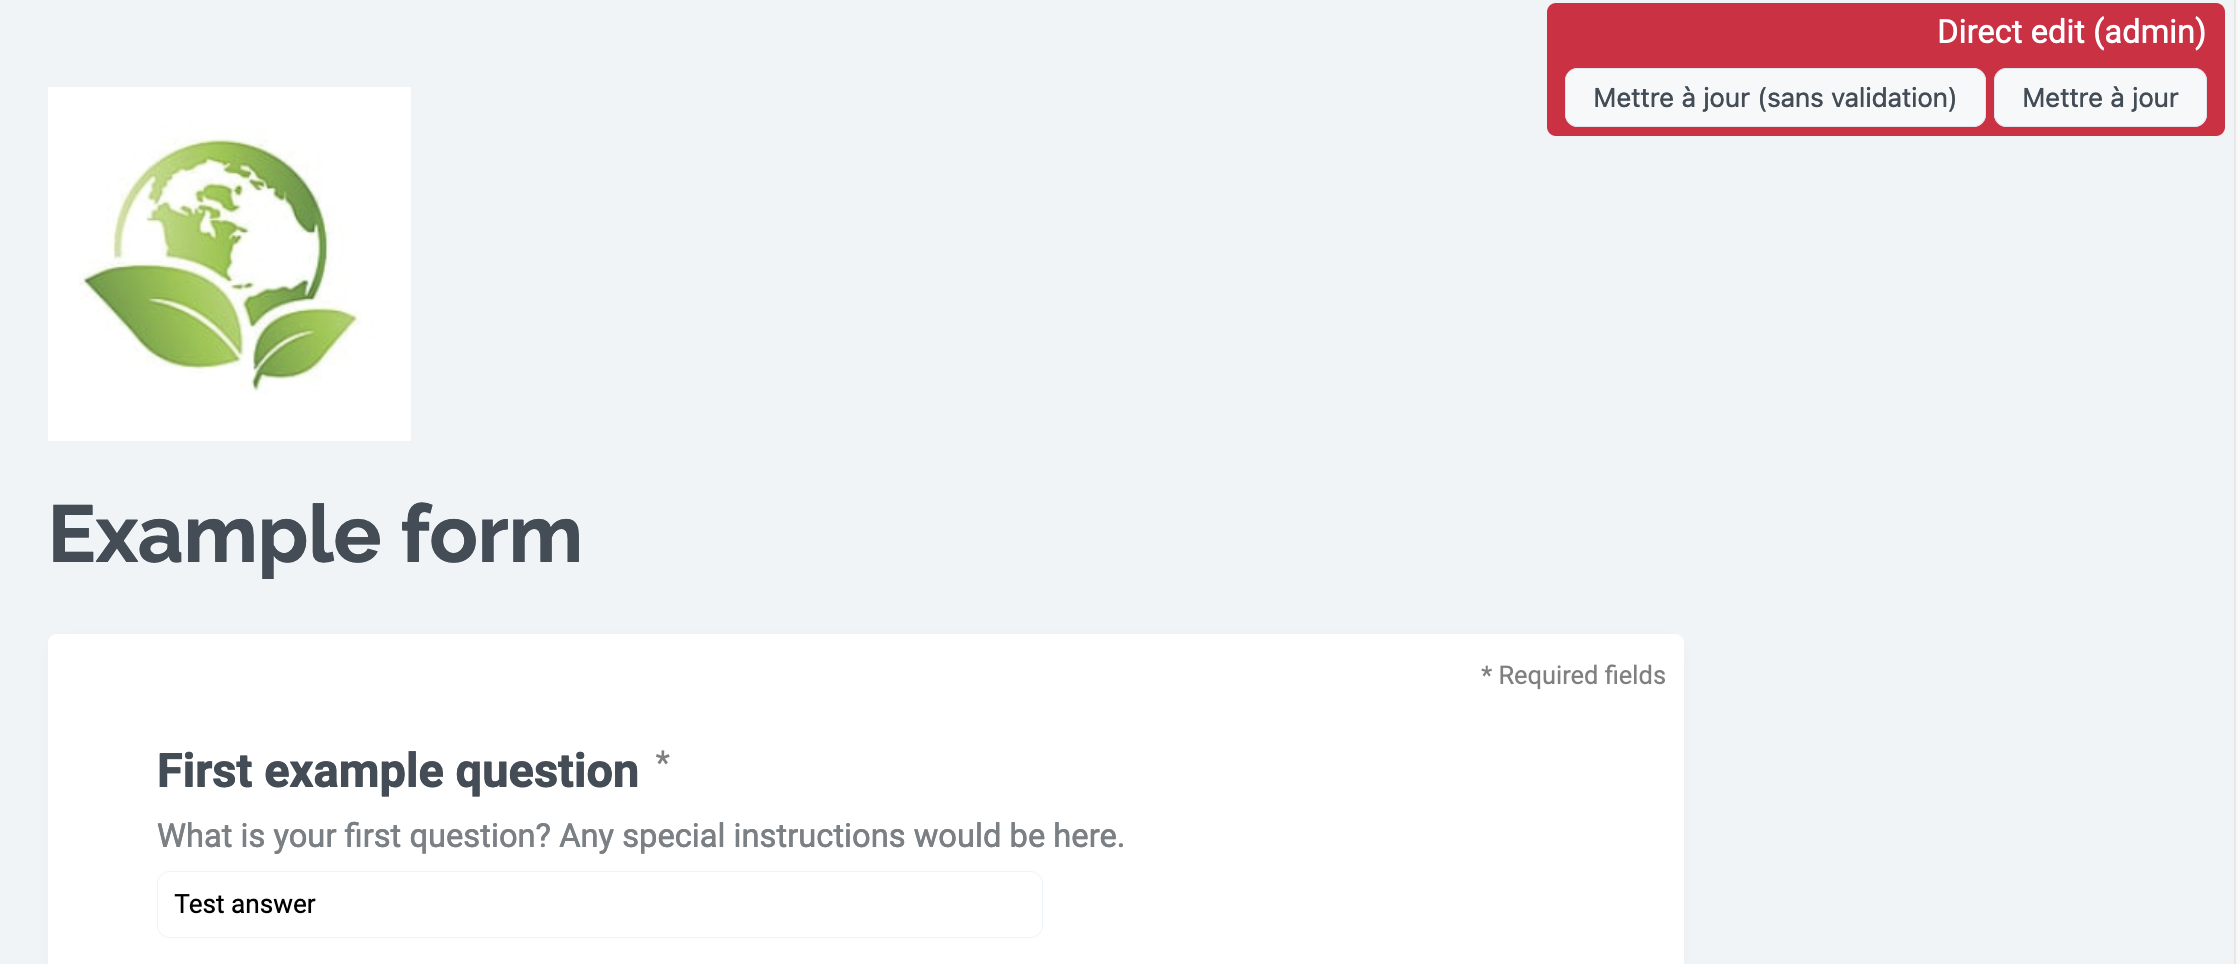
Otherwise, click on the pencil icon to edit it. Once you've rectified the contribution so that it fits the new question format, click on Mettre à jour in the red box to the upper-right.
If you would like to validate the contribution despite its incompatibility with the question format, click on Mettre à jour (sans validation).
Manually importing contributions
In some cases, it may be necessary to have contributors provide their contributions in a CSV or XLSX file. You can import those files to your form, and especially use Data Collection Form data moderation to ensure the quality of that data.
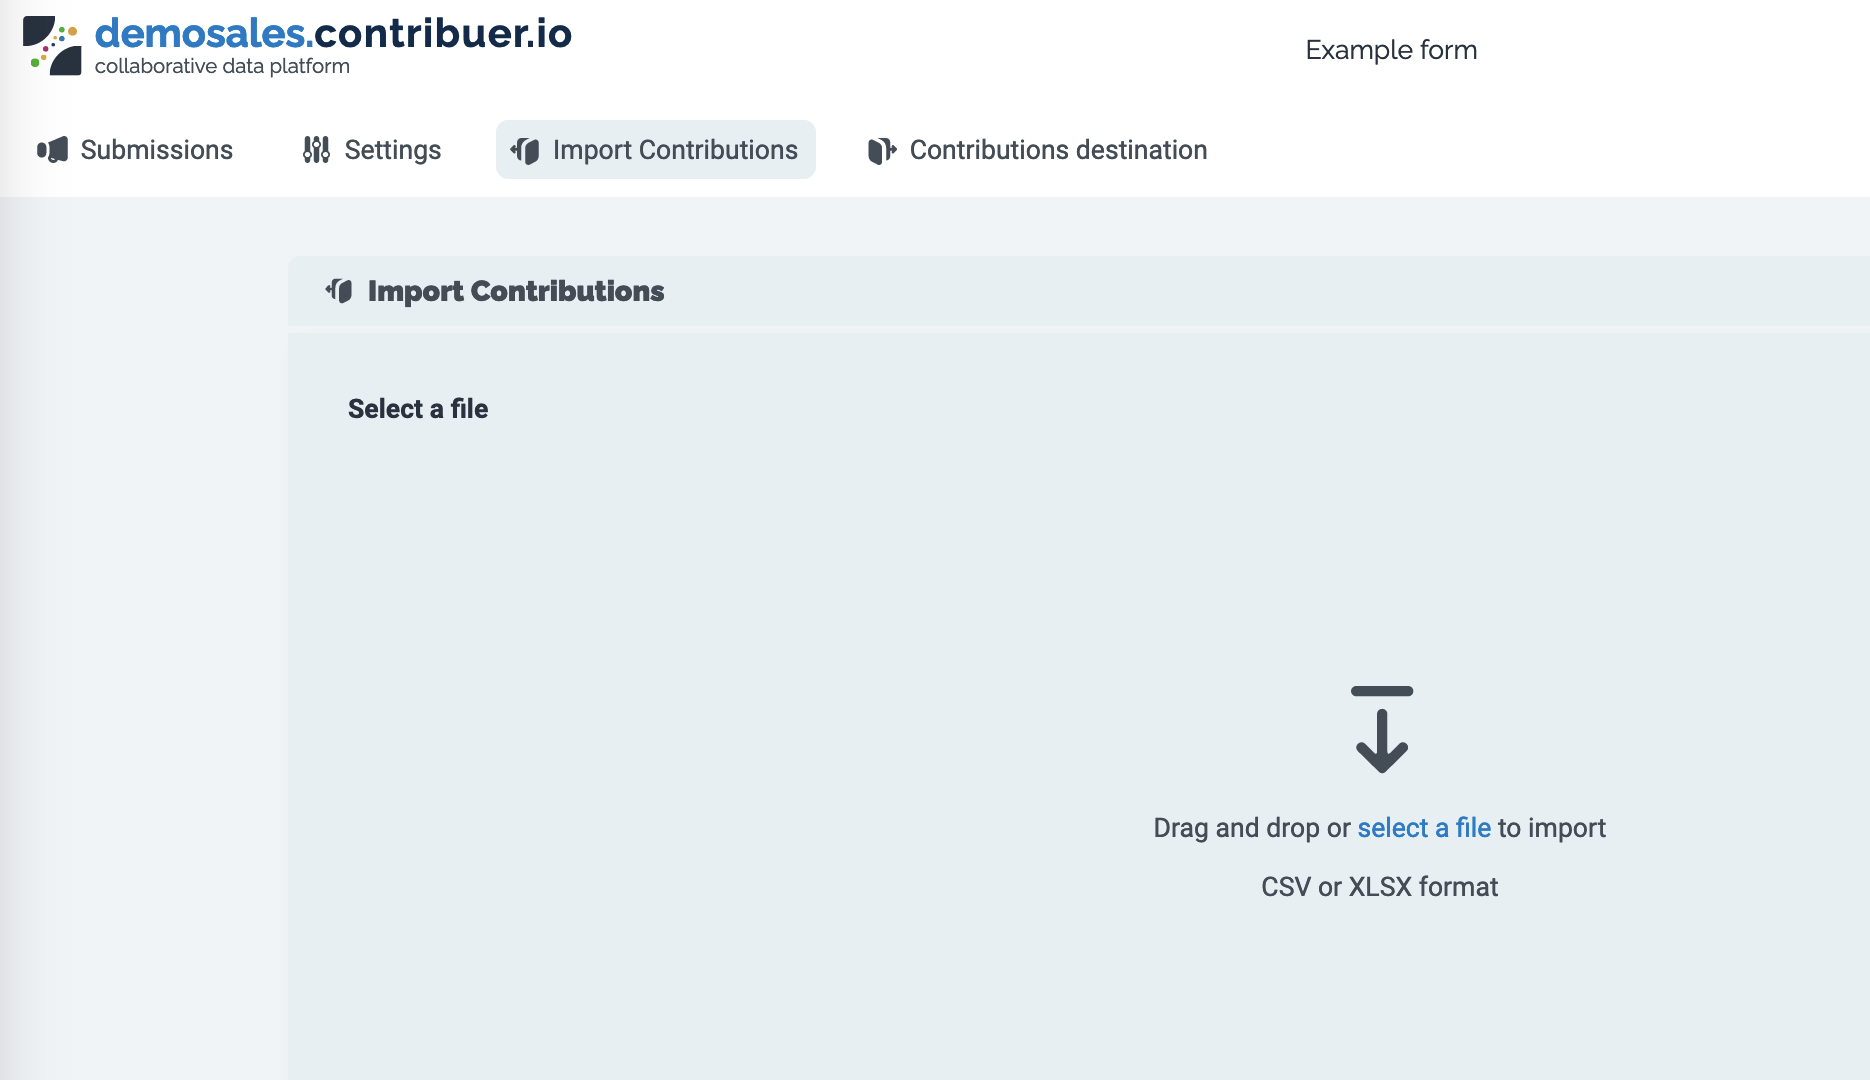
Click on Import Contributions to drag and drop or select a file to upload.
Note that you should be sure that the file you wish to upload is a CSV or XLSX file, and that the names of the columns match the technical names of the questions in the form. Depending on the file format, additional options may be proposed, such as the choice of separator for a CSV file.
Once the data is uploaded, you're prompted to moderate it.
If for some reason you're unhappy with the moderation you've already performed, you can start the process over. Note that when uploading that same file, you can select "Replace already imported contributions." All previously accepted contributions will be erased, and you will start the process anew.


