
Managing users
Note that a user's experience depends on your having configured your portal to be public or private. This determines if some or all of your users must log in to your portal. If your portal is private, all users must sign in to see even your public datasets or pages. If your portal is public, you decide if users need to sign in or not.
Below is a description of how users can sign in to your portal, how to manage a user's temporary access, and how to delete a user from your workspace.
For information about how to manage a user's permissions, see here.
Two ways users can join
Note that a user's Opendatasoft account and the portals they are registered for are now managed separately. To sign in to a portal, a user first needs an Opendatasoft account.
Users can join your portal:
If they are invited by an admin. Admins can invite users by sending them an email. Remember that admins are always able to manually invite users, even if the "Sign up" option is not enabled.
If the "Sign up" option is enabled, users are able to use their existing Opendatasoft account to register on your portal. Users without an Opendatasoft account will be prompted to create one before registering on your portal.
Users can also create an Opendatasoft account directly by going to https://account.opendatasoft.com, where they can click Create an account for free, then use their account to register on your portal.
1. Users can be invited to the portal
Only domain administrators or users with the "Edit workspace properties" permission can invite users.
You invite a user or users to your portal using their email addresses. Once invited, you can give them specific permissions and add them to groups.
If the user already has an Opendatasoft account, they will be asked to log in. If they do not, they will be prompted to create one.
Remember that you can ask users to fill out a registration form, if necessary.
See here for more information on how to invite users.
2. Users can request an account on their own
To enable your users to sign up, go to Access > Log in & Sign up. See here for more information.
When enabled, the "Allow users to sign up" allows users to authenticate themselves on your portal. Once enabled, your portal will show a small link in the upper right-hand corner to propose signing up to your portal.
Keep in mind that, on its own, logging in does not grant any additional access to data or pages. However, being identified means they are able to be given specific permissions and data quotas:
You may provide permissions to specific users or groups of users, typically to create, update, or publish datasets, but also to perform other actions you may wish them to in your portal's backend.
You may adjust users' data quotas, often in order to give specific users higher quotas than the general public.
Authenticated users can also ask to be notified when specific datasets update.
Managing a user's temporary access
You are always able to modify the amount of time your users have access to your portal. Go to Acces > Users > the user's individual information. There you can click on Manage time-controlled access.
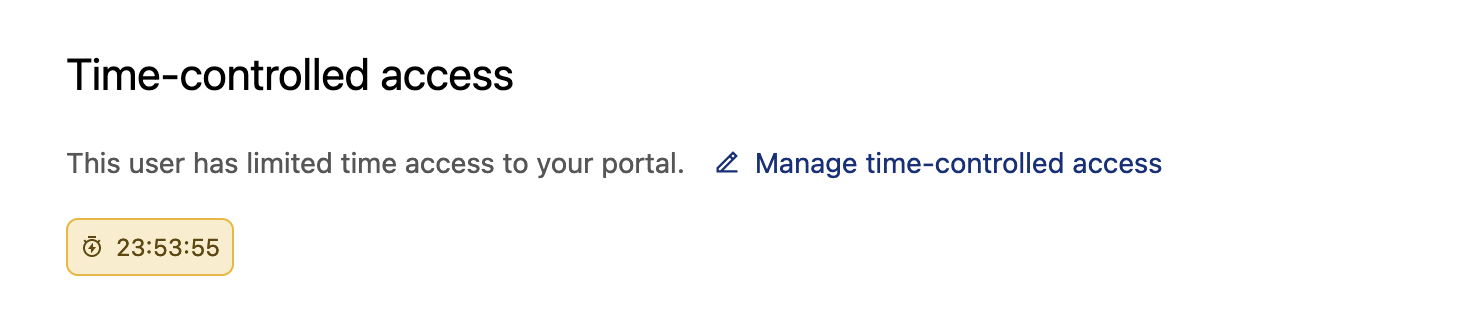
If the user has limited access, you will see a counter showing how long the user has left. In the example above, the user has access for the next 23 hours, 53 minutes, and 55 seconds.
At the end of the designated period, the user's access will be revoked and they will be removed from your list of users. They will no longer have access to the back office, and any API keys they created will be revoked. If they need access again, you will need to reinvite them.
How to modify a user's temporary access
To revoke a user's access, to modify the amount of temporary access they have remaining, or to give the user unlimited access:
Click on Manage time-controlled access
Select the appropriate access, and click Apply
Click the Save button in the upper right-hand corner for that user's settings

Deleting a user, or revoking their access to your workspace
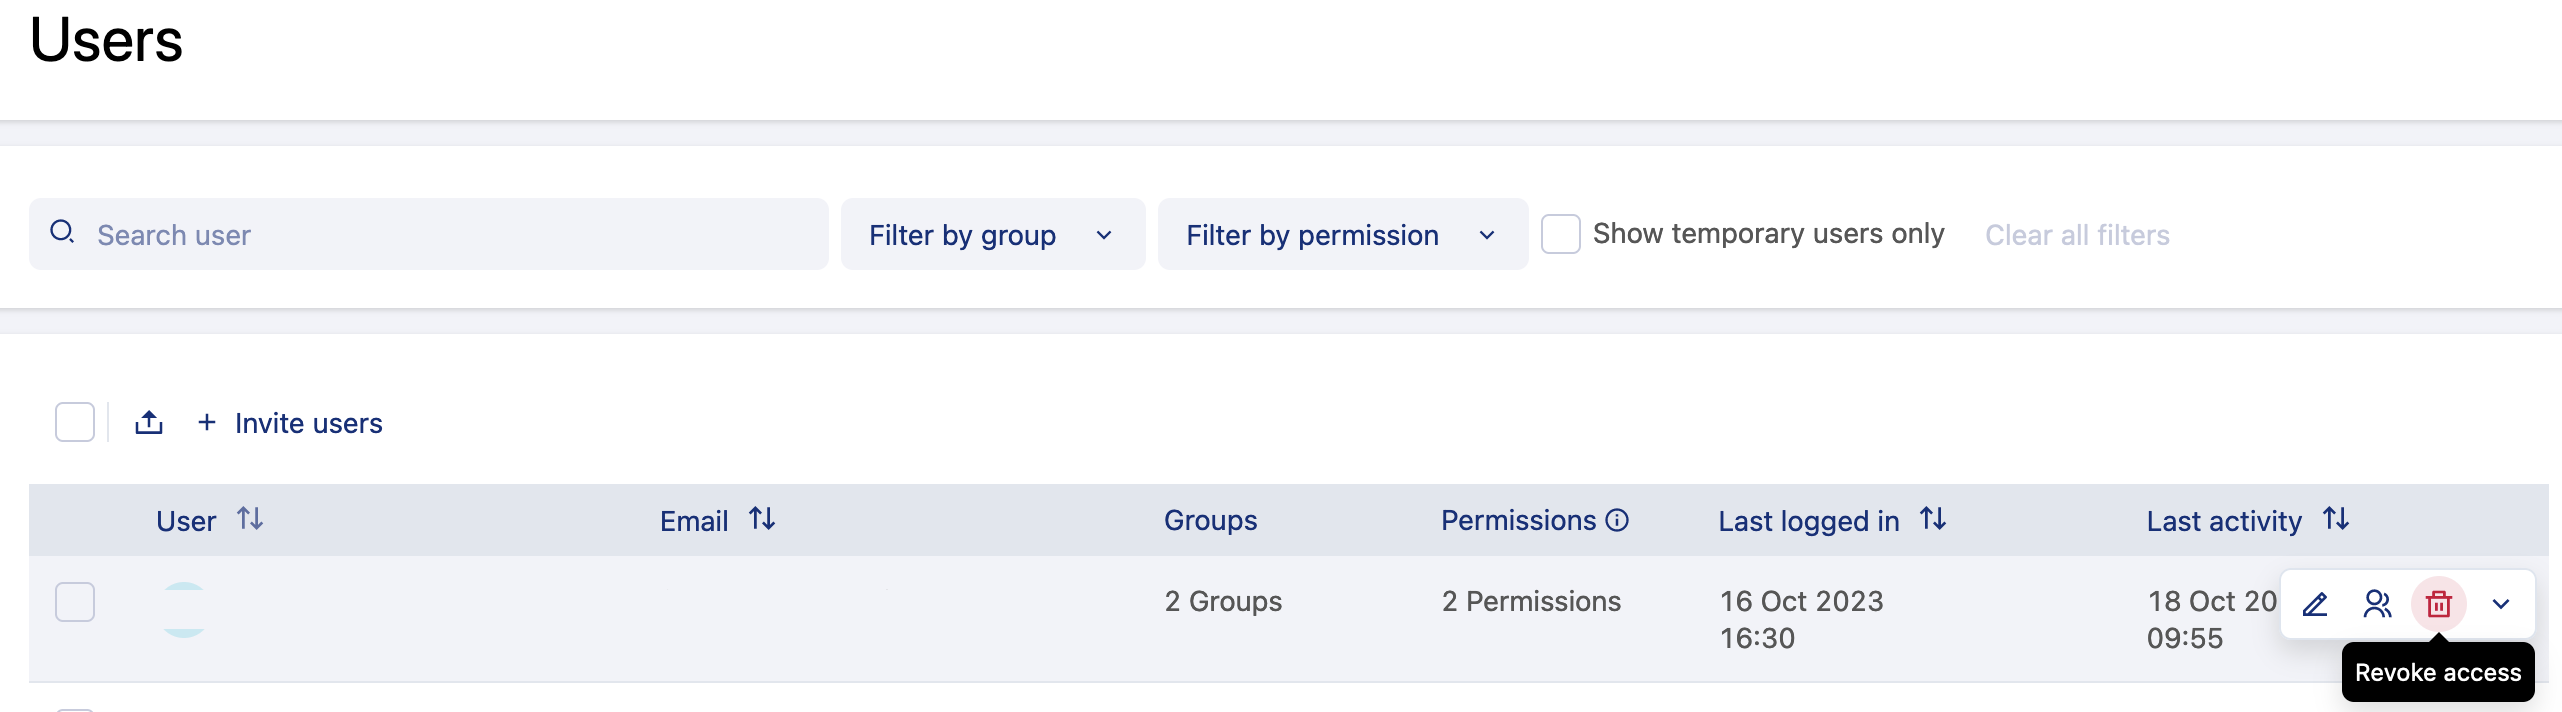
To delete a user from your workspace, or more precisely to revoke their access, go to Acces > Users. There you can click on the trash can icon on the right when you roll over that user. Alternately, you can edit the user, and find the option to revoke them by clicking on the three-dot icon in the upper-right-hand corner.
Any group assignments and permissions given to that user will be lost.
Note that revoking a user from a workspace means only that they will have no more access to that workspace than an anonymous user. This does not delete that person's Opendatasoft account, nor any access they have to other workspaces. And this does not keep you from later reinviting the user using the same email address should you need to do so.
If a user wishes to be permanently deleted from the Opendatasoft platform, you should ask them to send a request to our support (support@opendatasoft.com).