
Translating a dataset
For workspaces with more than one language activated in the portal, Opendatasoft allows the translation of specific parts of the datasets, as well as their metadata. Once translated, this information can be enabled in the dataset according to the language the user has selected in that portal.
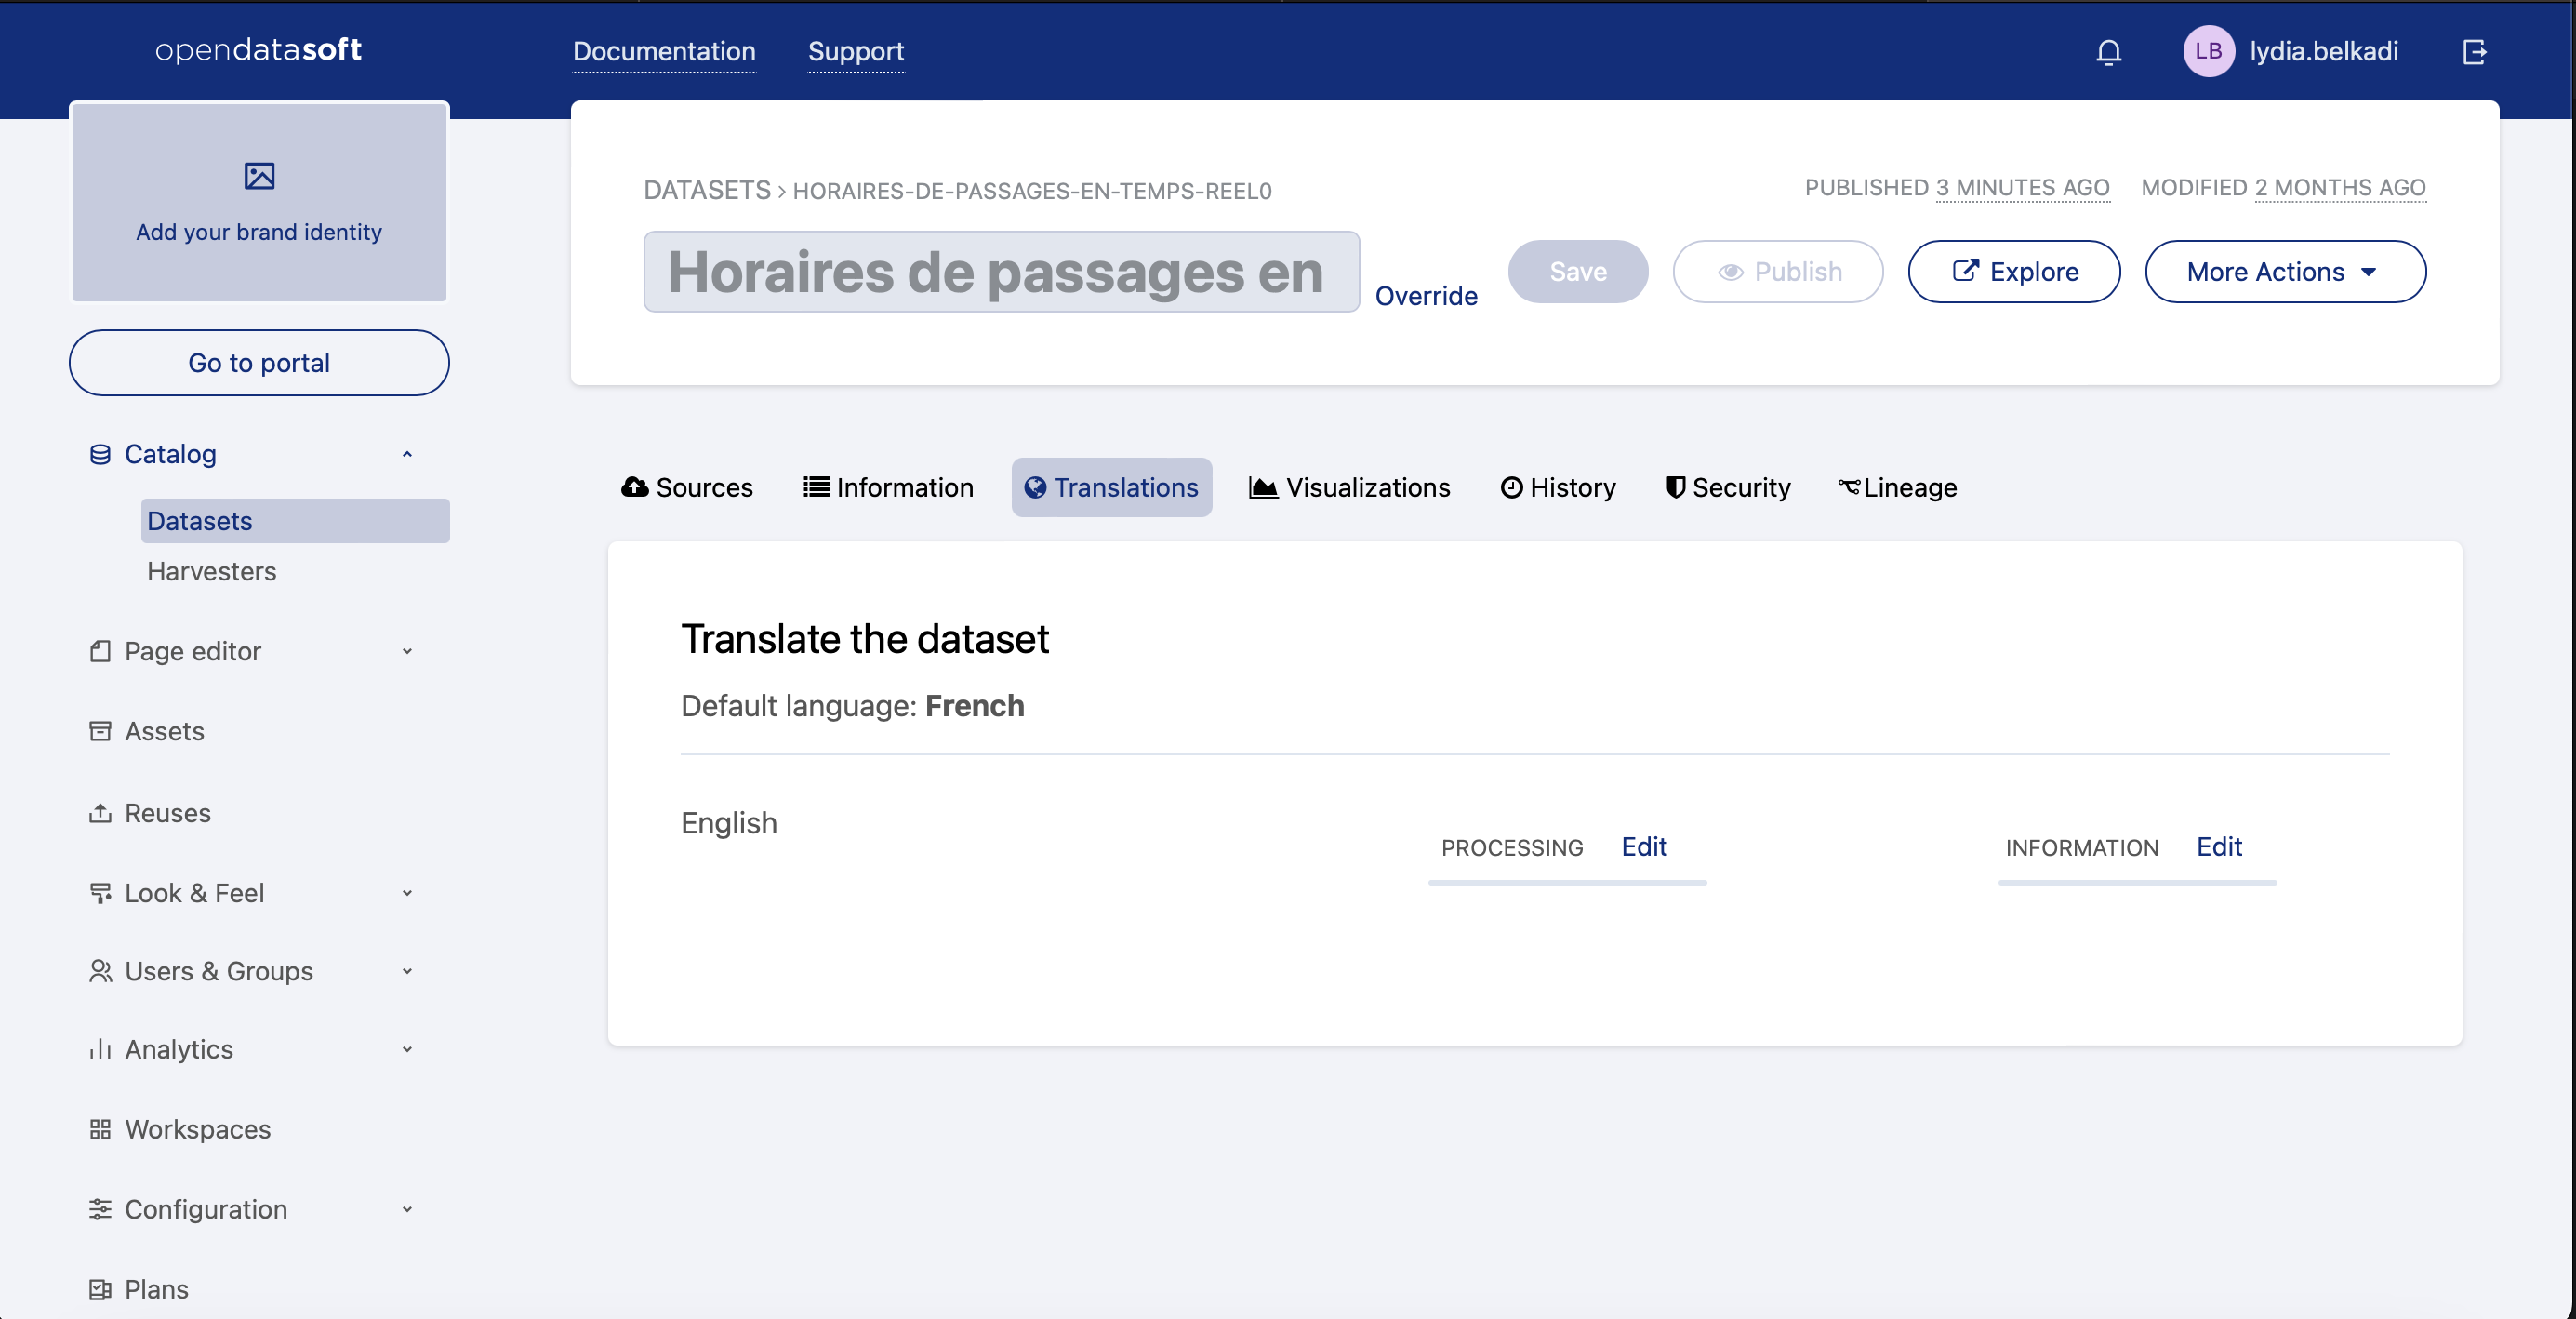
All translations are done in a dataset's Translations tab in the back office.
Choosing elements for translation

For each language available in your portal, you can translate elements from two of your dataset's tabs:
The Schema tab, which contains the dataset's fields that can be translated.
The Information tab, which contains four standard metadata that can be translated: Title, Description, Keywords, and Publisher.
A progress bar is displayed to indicate how many of the elements have already been translated for the selected tab and language.
To start translating chosen elements from the dataset:
For the language you want to translate into, choose whether to translate elements for the Schema or the Information tabs.
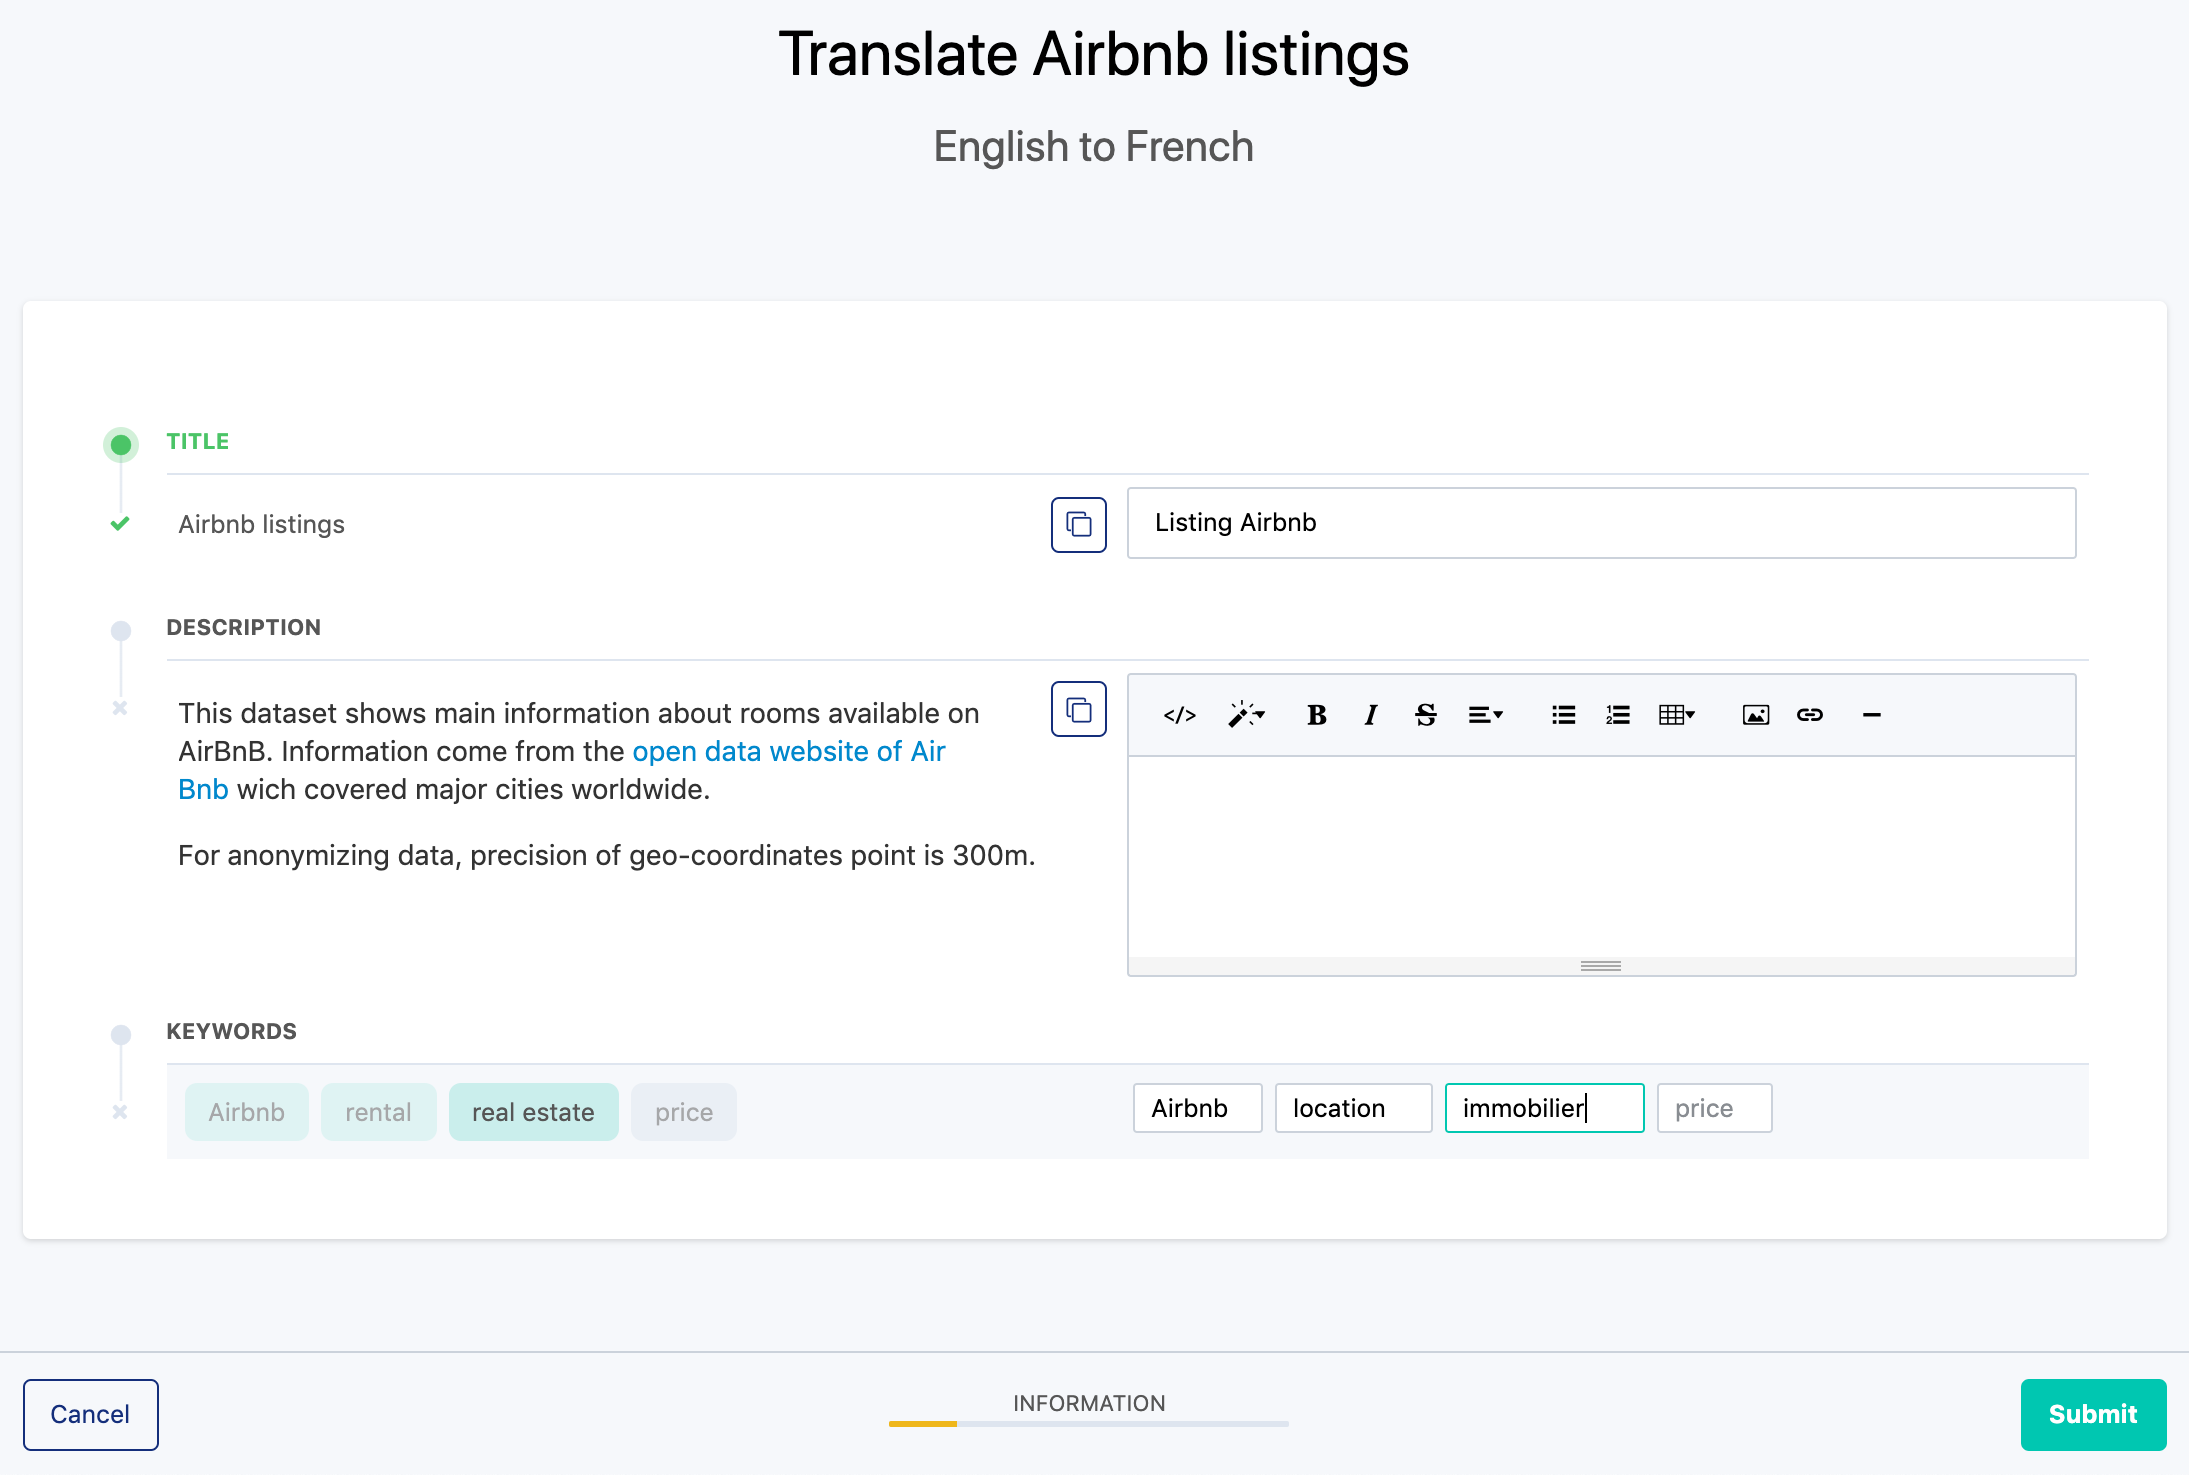
For the chosen tab, click on Edit. A translation interface appears.
Note that the translation interface only proposes for translation elements that have already been configured in the original language. For example, if the "Publisher" metadata has not already been configured in the Information tab, it will not be possible to translate it.
The left side of the translation interface displays the elements that can be translated, along with their value in the original language.
Untranslated elements are preceded by a gray "x."
Translated elements are preceded by a green tick mark.
The right side displays the text boxes where the translations should be written. The translations can be:
New translations
Suggestions proposed by the platform
If an element is not translated, it will appear in the portal in its original value, whichever language is selected by the user.If an original element is modified after it has been translated, a notification will be displayed in the Translations tab, as well as in the translation interface. In the latter case, you can choose to keep the current translation or modify it. Until this has been done, the original non-translated value will be displayed in the published dataset.
Adding and validating translations
To add a new translation, simply type it in in the corresponding text box and click Submit. If the original value should be kept as is (for example, a data producer's name), click the copy button to fill up the translation text box with that same value.
However, if a value has already been translated in another dataset in your workspace, the platform will automatically suggest that translation for the same value. In that case, the suggested translation is automatically written in the translation text box as a proposition to be validated or rejected.

Click Yes to validate the suggestion, or No to reject the suggestion, and remember to click the Submit button to save your translations.
To validate all translation suggestions, click the Validate all suggestions button in the top-right corner of the translation interface.
Choosing which columns display in different languages
You can configure specific columns in a dataset to display only in certain languages.
For more information, see "Configuring a dataset's filters and visible fields according to your portal's languages."