Creating a new workspace
To access the Workspaces menu, users must be granted the permission Manage all secondary workspaces.
There are three steps to set up a new workspace:
1. Fill out your workspace's basic information
2. Configure your quota limits
3. Distribute content (optional)
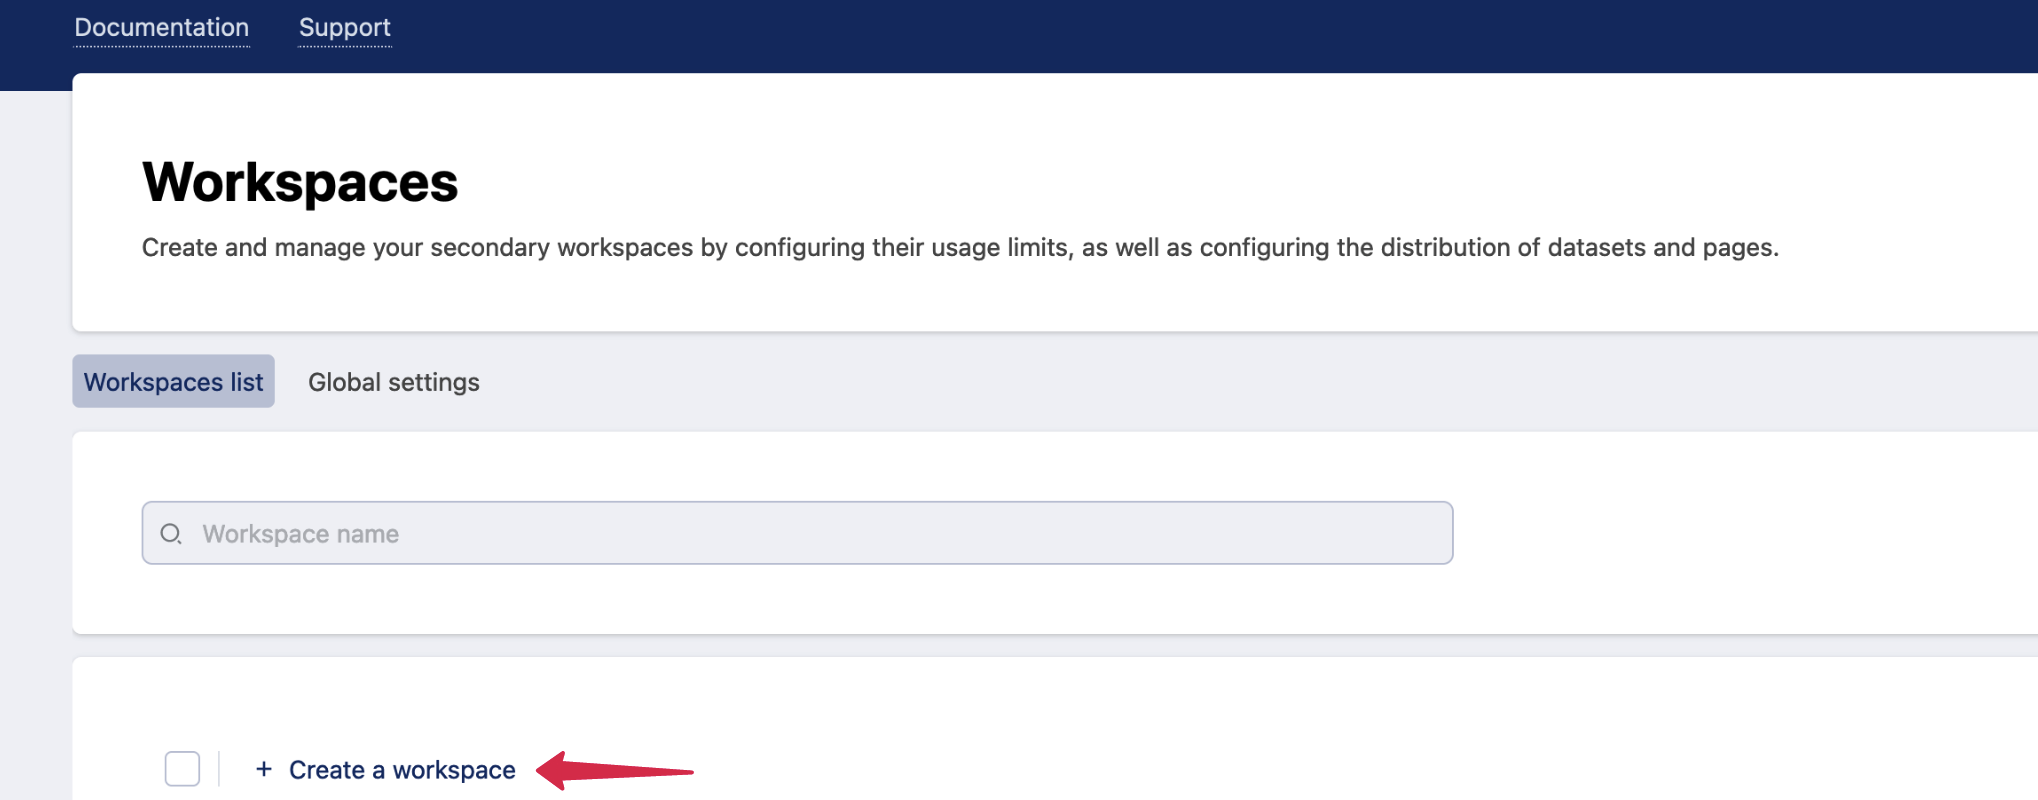
Once you are on the workspaces summary view, click on the button Create a workspace.
On the workspace creation page, you will be prompted with two main sections. Follow these steps to fill them out correctly:
1. Fill out your workspace's basic information
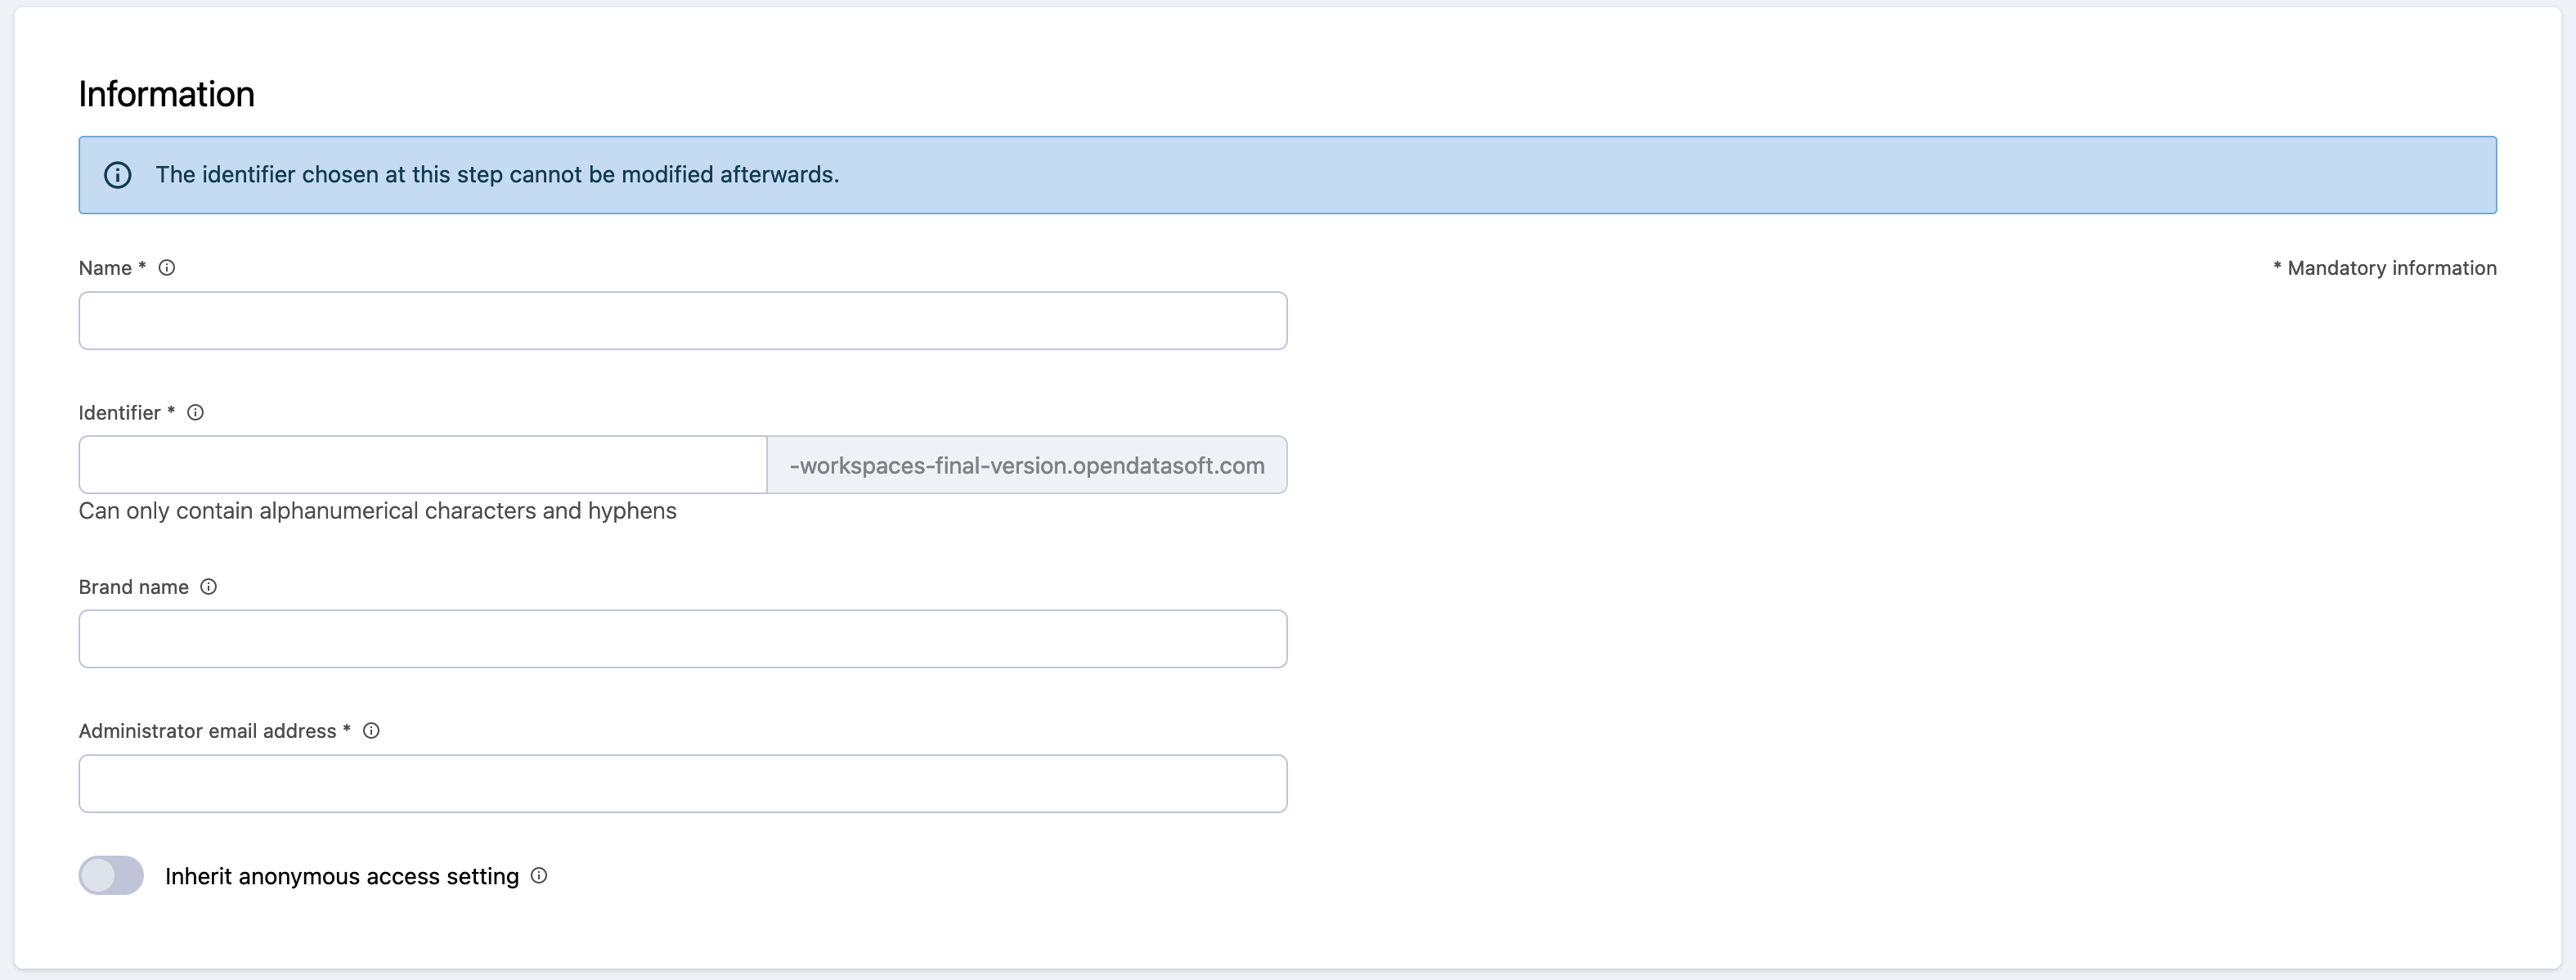
The information section provides fields for your workspace's basic information:
Name: The name of the workspace, which will appear, for example, in emails. This can be changed later by any administrators of the workspace created with the branding menu.
Identifier: The unique identifier used to make up your workspace's URL. The limit is 27 characters.
Once the workspace is created this identifier cannot be changed, so be careful with the name you enter here.
Note that the URL of your workspace will be: <Workspace Identifier> - <Main Workspace Identifier>.opendatasoft.com. For instance, if you own an Opendatasoft workspace named myawesomeworkspace (that can be accessed at myawesomeworkspace.opendatasoft.com) and you create a secondary workspace with the identifier test, the full secondary workspace address will be: test-myawesomeworkspace.opendatasoft.com.
Of course, if allowed in your plan, you can contact the Opendatasoft's Support Team to get your workspace name DNS customized. For more information, see Customizing your workspace's URL.
Administrator's email address: The email address of the primary workspace's administrator (the owner is granted full administrative privilege over the newly created workspace). This email address does not have to belong to a user who already has an Opendatasoft account. In that case, the Opendatasoft platform will automatically initiate the account creation procedure for that person.
Inherit anonymous access setting: If this option is enabled, the secondary workspace will have the same portal security settings (public or private) as the main workspace. Note that if your main workspace is private, your secondary workspaces cannot be public. For those workspaces, the option will thus be enabled and not editable.
2. Configure your quota limits
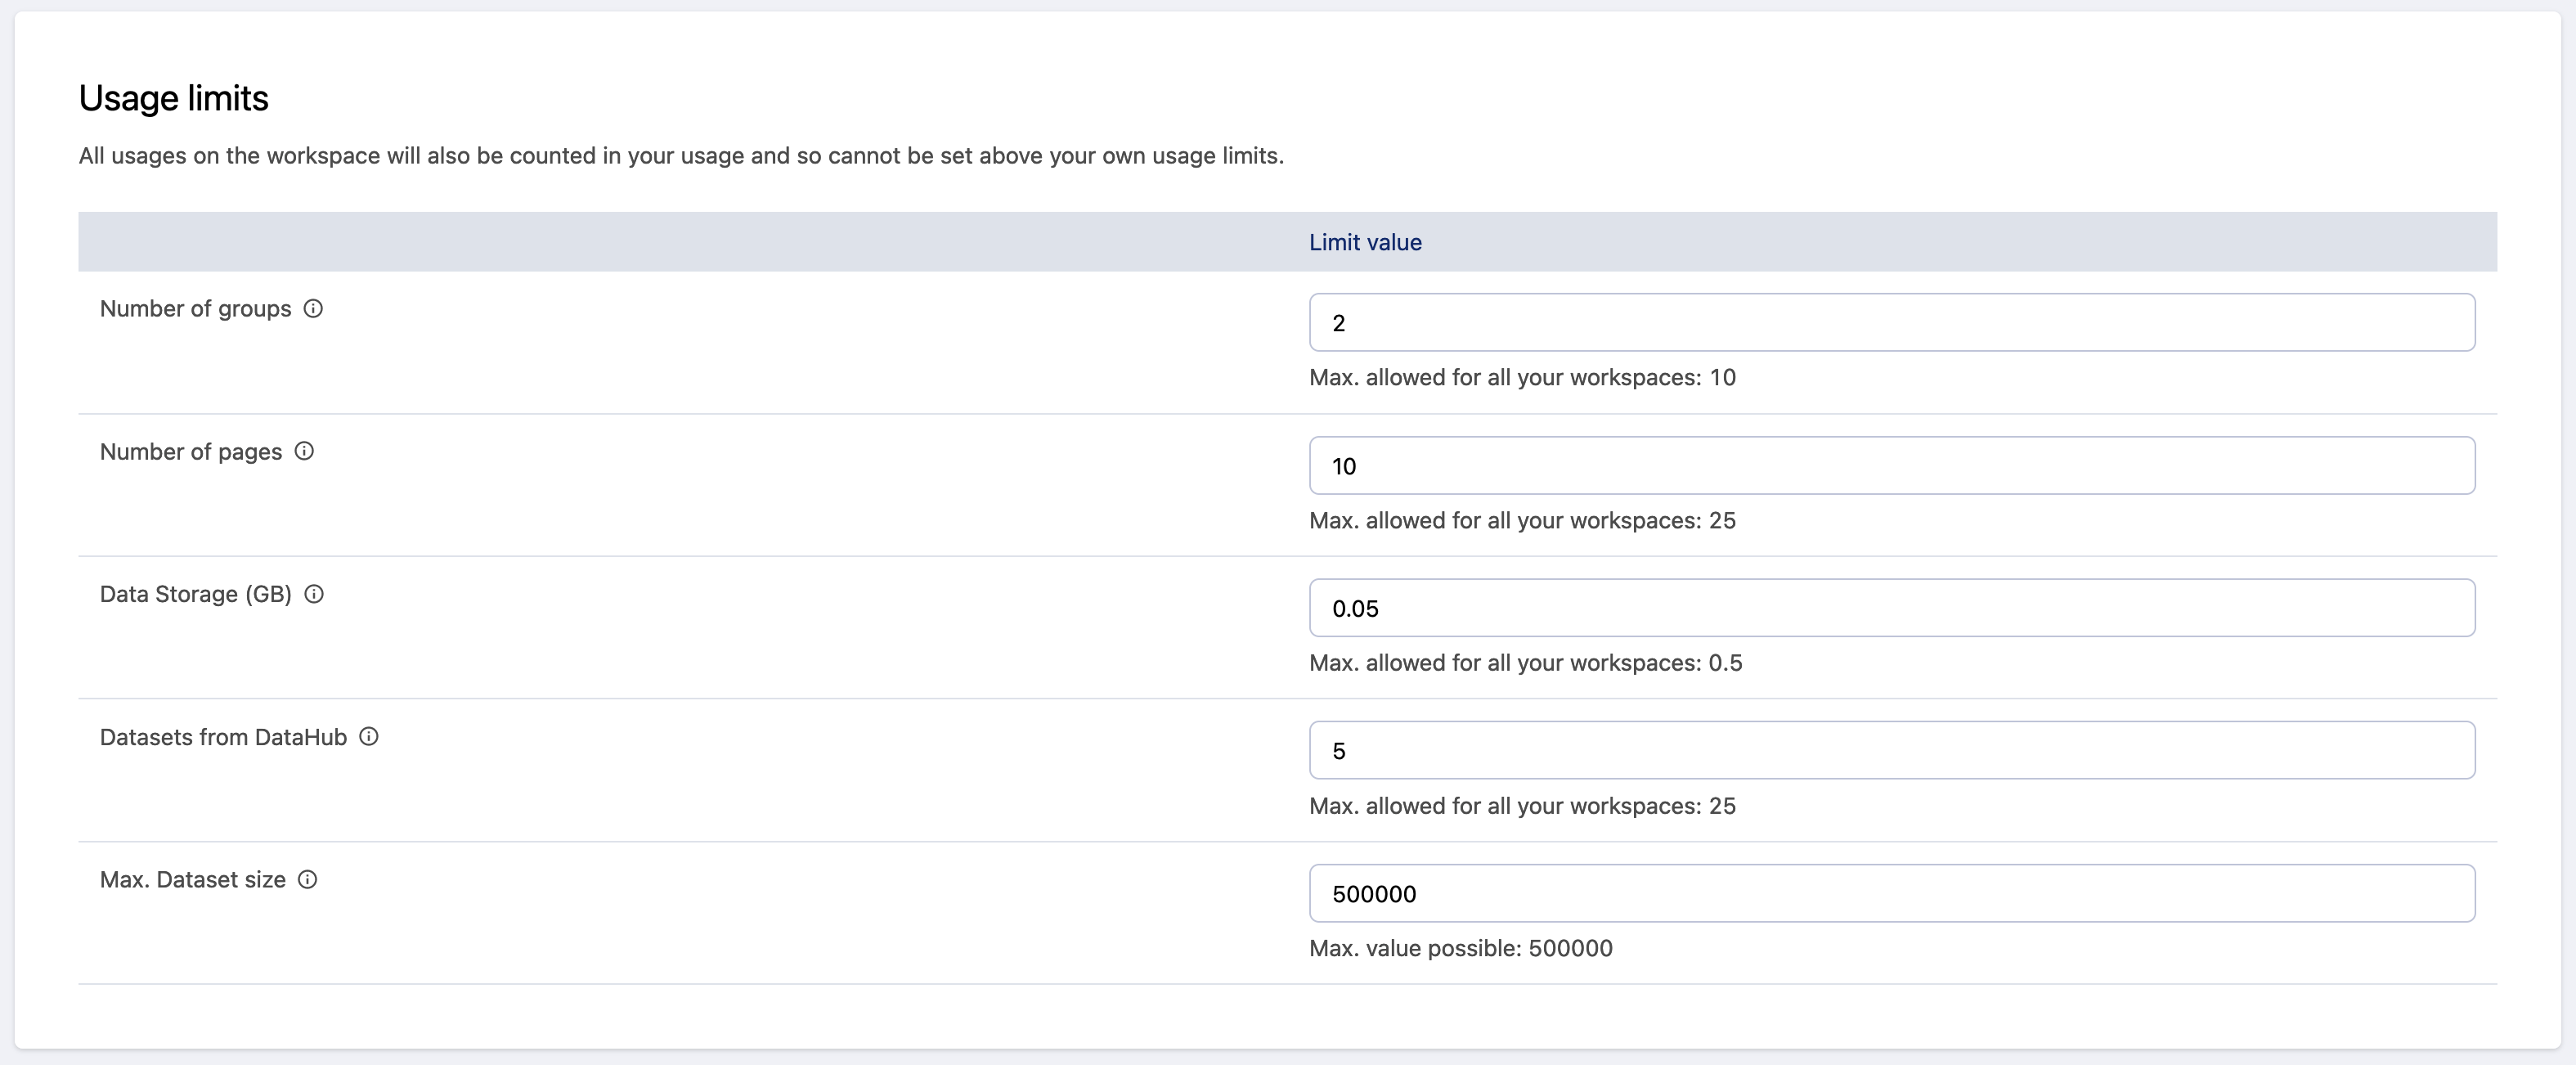
The second section lets you define specific usage limits for the quotas included in your plan (please see this article for more details about the quotas meaning):
The usage of your secondary workspaces (data storage, number of pages, etc.) is included in your main workspace's quotas. To prevent one of your secondary workspaces from consuming too much, you can assign individual limits to each workspace.
Note that setting individual limits for a workspace does not assign a part of your quota to that workspace. Instead, it simply acts as an upper limit to how much that workspace can consume. So, if you have a quota of 1 million API calls per month and have five secondary workspaces, each with 500,000 API calls per month, all the quota of your primary workspace could still be consumed entirely by secondary workspaces, but it allows you to plan ahead in the case of a sudden surge in API calls on any one workspace. In short, we recommend that you take advantage of your ability to set individual limits and plan ahead.
The value defined for each quota will be visible as quota limit on the "Plans page" of this secondary workspace.
When you've finished filling out the form, click on Create at the top of the page. Once created, the new secondary workspace appears in the workspace list, along with information related to its current quotas usage. Your configuration is done—good job!
3. Distribute content (optional)
If you want to push datasets or pages from the main workspace to secondary ones, you can do it with the distribution feature.
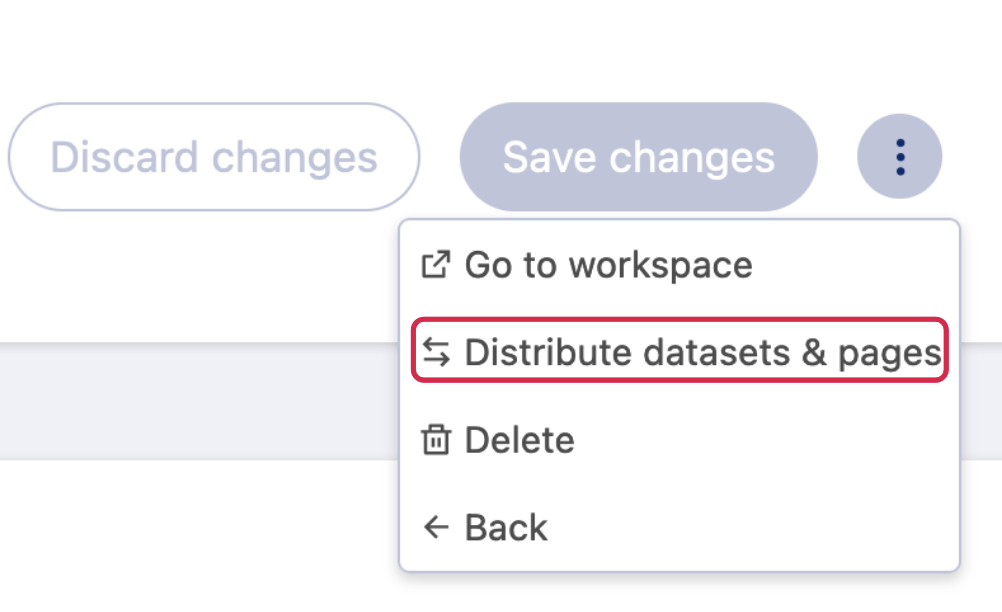
Click on the three dot menu in the top right, then click on Distribute datasets & pages.
You will be redirected to the distribution page. The procedure to distribute datasets and pages is explained here: Distributing content to workspaces.


