
The ODS Forms feature
The ODS Forms editor is a powerful tool in our platform that allows you to create, customize, and manage forms with ease. These forms can be used to gather data from users and integrate the results into datasets.
Note that this feature is an add-on and is not available by default in your Opendatasoft plan.
To access the Forms feature, click on Forms in your back office's main navigation panel.
The Forms list view
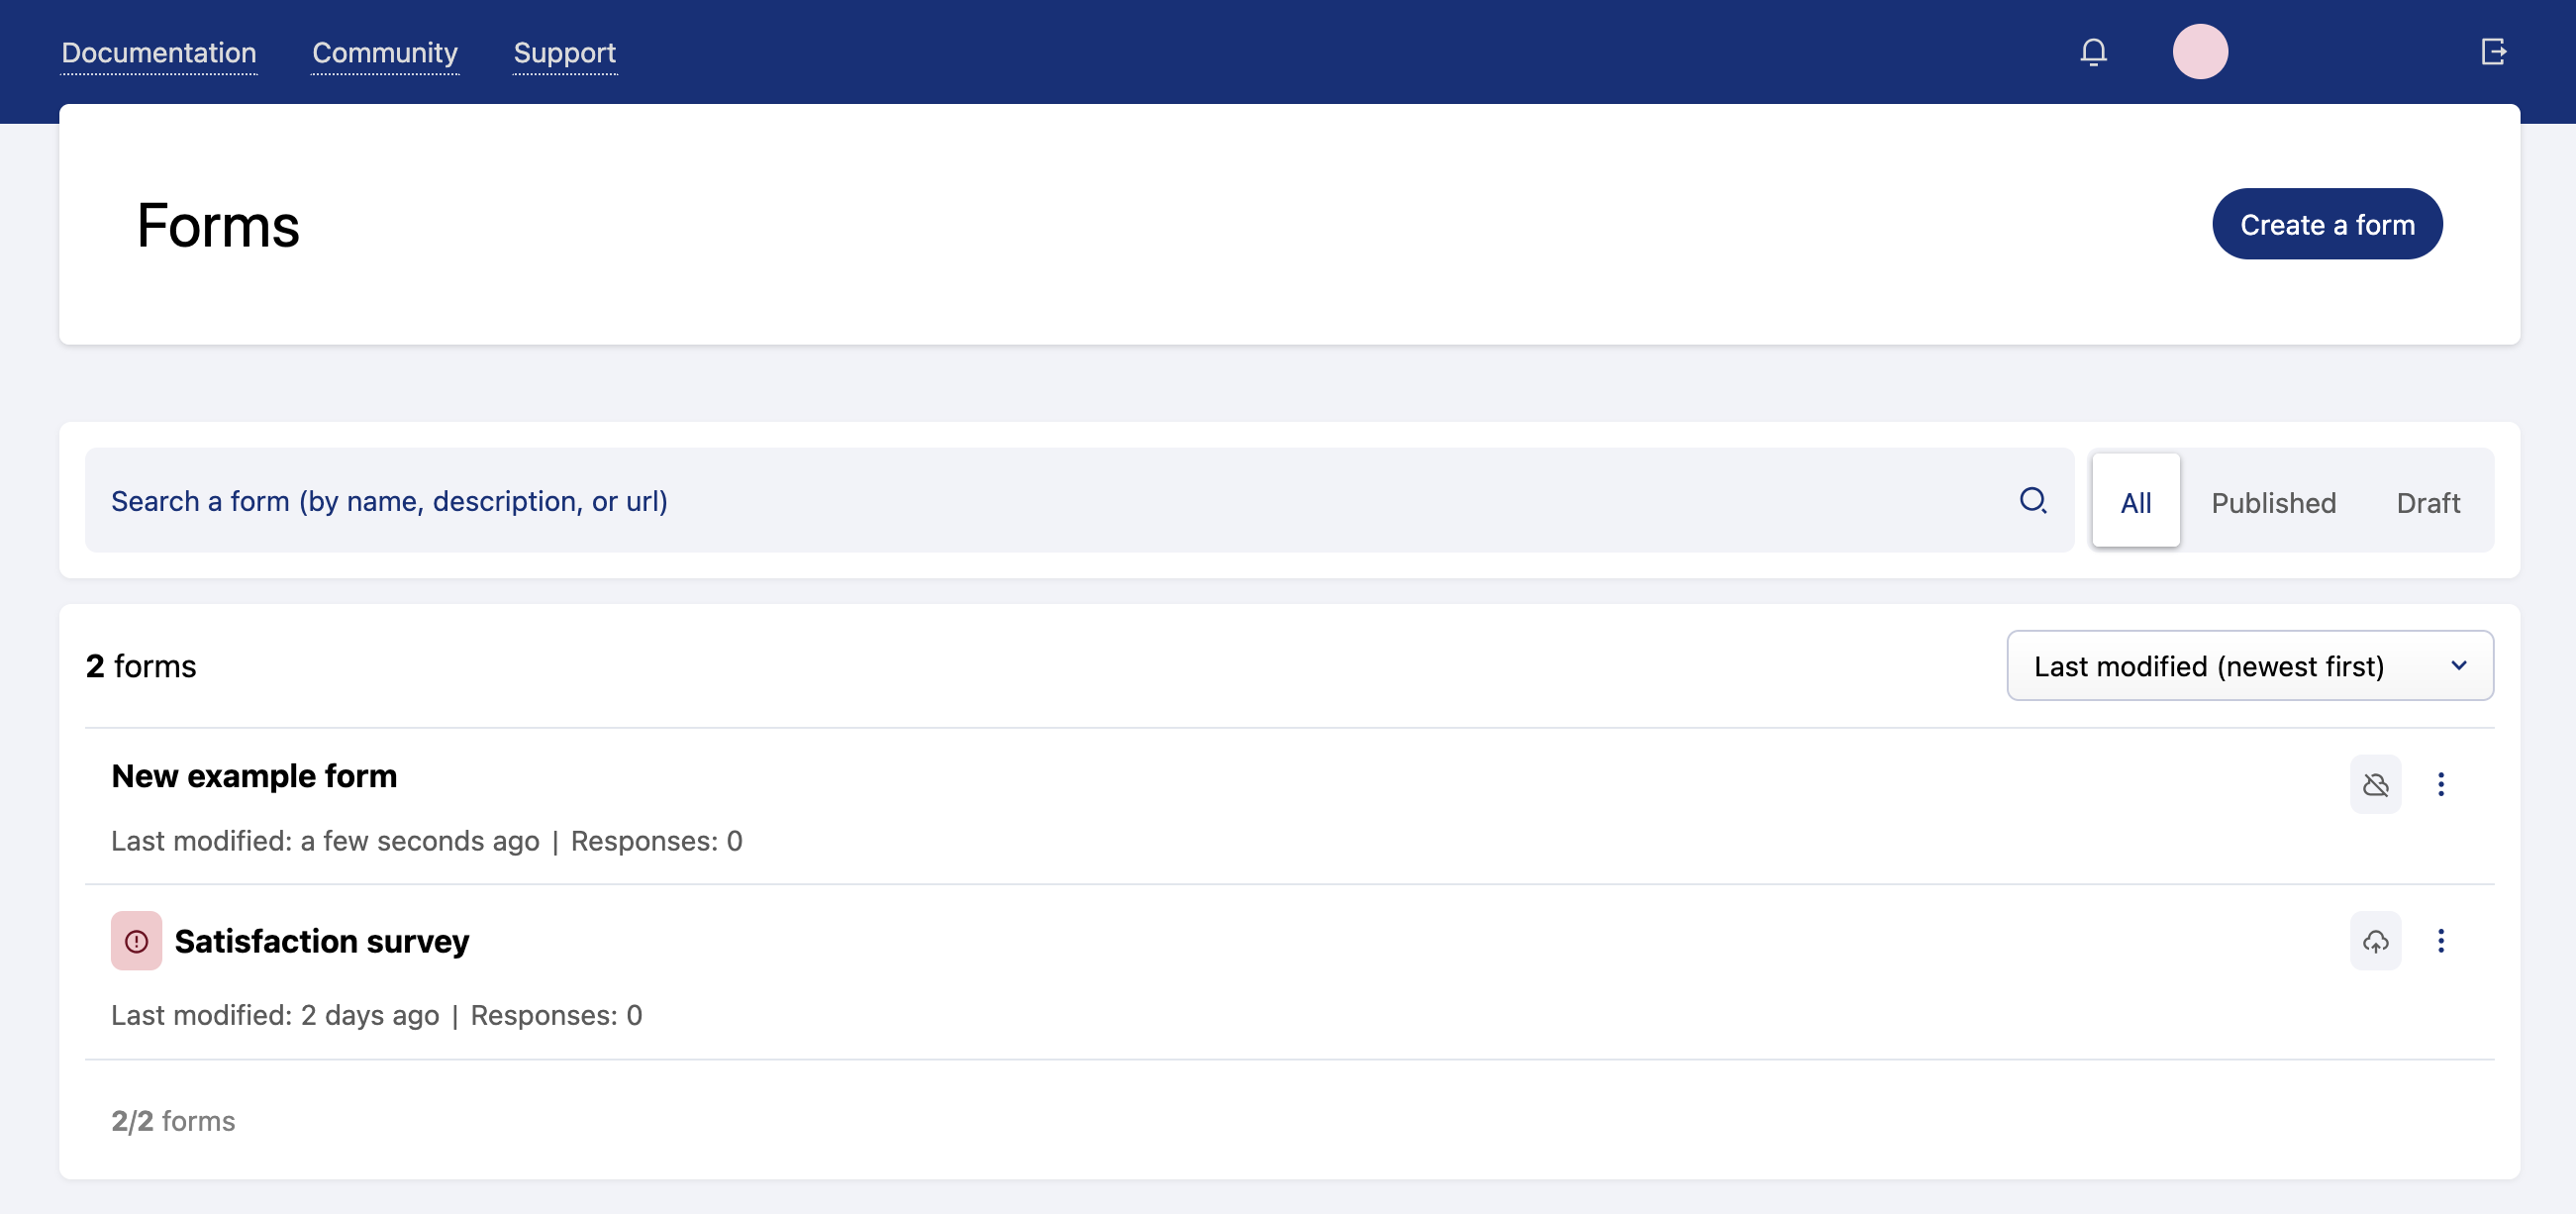
Once you've created your first form, the default view in Forms is a list of your published and draft forms.
You can search for a specific form in the search bar, as well as filter the view by clicking on Published or Draft to the right of the search bar. You can view, edit, and publish or unpublish an existing form by clicking on it or its three-dot menu. And finally you can also click on the button in the upper-right to Create a form.

For each form in the list, you can see its title, any relevant notifications, its publication status and three-dot menu for further options, when it was last modified, and how many responses it has received.
Note that depending on your plan, the number of forms you can create may differ.
The Forms editor
To edit a form, click on its title, or else select Edit from the form's three-dot menu.
Once you've selected a form to edit or manage, the feature is broken into four functional sections, available in tabs across the top of the screen: Build, Access, Share, and Results. In addition, in the upper left corner, you can access the Form settings, where the different preferences, langauges, and actions for your form are configured.
Note that all changes you make to your form are saved automatically.
The Build, Access, and Form settings are discussed below. Go to this page to see the documentation for the Share and Results tabs.
Build: Creating and editing your forms
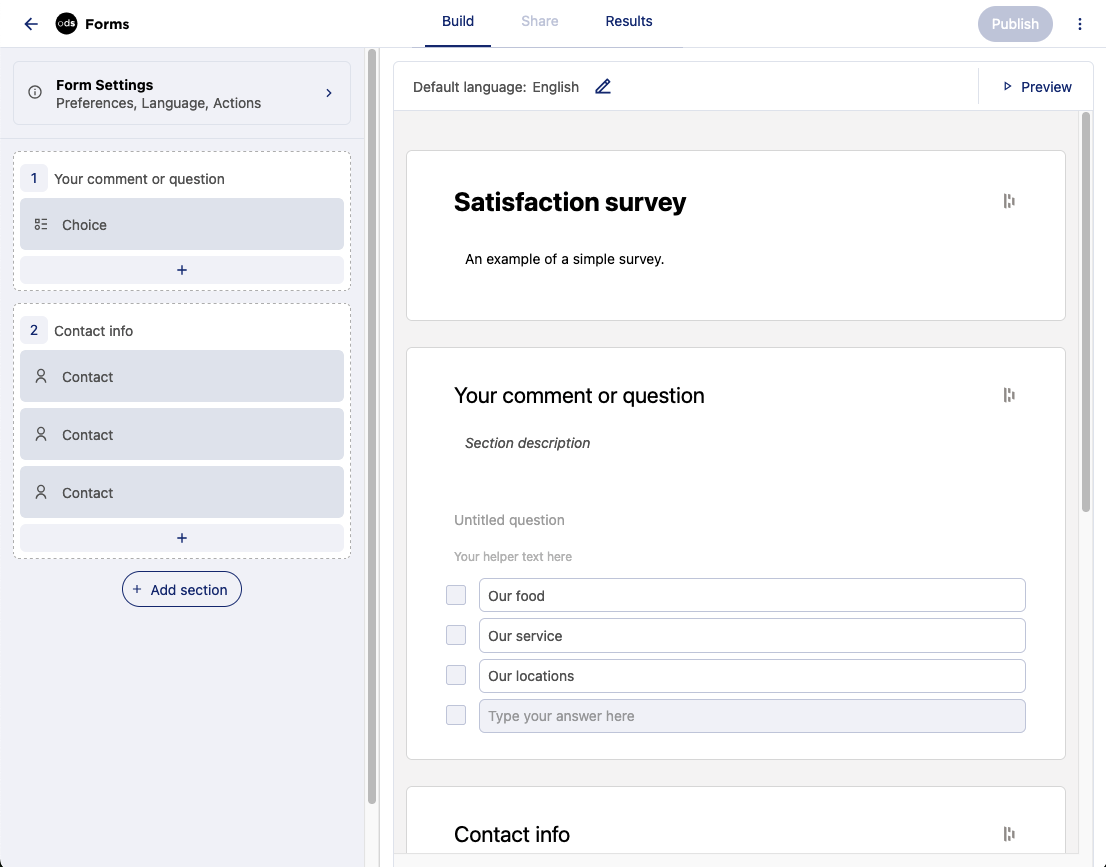
The Build tab is where you will actually create your surveys.
Once you selected a form to edit, you can start by filling out the form's title and description.
Fundamentally, a form is made up of input blocks—different kinds of questions or expected inputs, such as text, numbers, multiple-choice values, or dropdown menus. But to keep things organized and clear, input blocks are grouped inside at least one section.
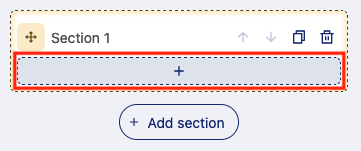
ADDING SECTIONS:
To be begin adding content to your form, click on the Add section button below the form settings on the left.
ADDING INPUT BLOCKS:
Within a section, click on the bar with a plus sign to add and define a new input block.
Select the type of block from the list, and click Validate. Each input block must be configured differently. See this page for a list of all available input blocks and how to configure them.
As you add blocks, fill in the information each requires (e.g. the question the user should answer, labels, helper text). Note how some input blocks allow you to add additional fields by clicking on the Add field button.
To edit an existing block, double click on it. To reorganize your sections, input blocks, or fields, you can drag or drop them using the small icon on the left of each block, or else use the up or down arrows visible when you roll over them. To delete a section, block, or field, roll over them and click on the trash icon.
Don't forget to use the Preview button in the upper-right-hand corner to test how the form will appear to users, and adjust your form accordingly.
Access: Configure who has access to your form
The Access tab is where you configure who has access to your form, and the kind of access they have.
"Access" settings:
Open access is just like it sounds: The form is public. Anyone has access to the form, whatever your portal's security settings may be. For example, even if your portal is private, your form will be public.
Authenticated access enforces access according to your portal's security settings. For example, if your portal is private, users must be authenticated to have access, but no further restrictions are applied.
Restricted access limits access to specific authenticated users or groups of authenticated users.
You must select Restricted access for the users or groups specfied under "Users" to apply.
"Users" settings:
Under "Users," you can provide view only access; view and moderate access; or view, edit and moderate access.
Click into the bar to "Select users," designate user or users you wish to give access to, specify on the right the kind of access you wish to give them, then click on the Add users button.
Finally, note in the list that you can always modify a user's access or delete them from the list.
"Groups" settings:
"Groups" functions in exactly the same way, only for your workspace's groups.
Form settings:
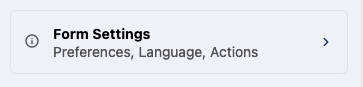
To configure a form's preferences, languages, and actions, click on Form Settings in the upper left corner when editing a form.
a) Preferences
General information: Here you specify the form's URL.
Note that a URL is required for you to publish the form.
Once the form is published, the URL becomes definitive, so keep this in mind!
Verification: You may activate a ReCaptcha on your form. This option is available if the domain option is enabled in the Security section.
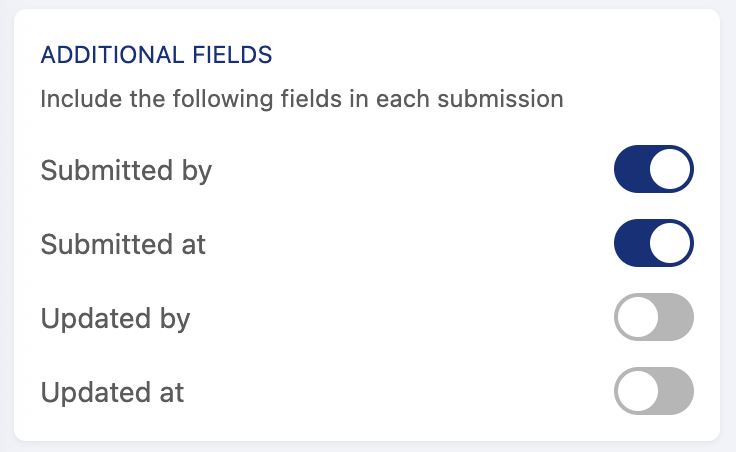
Additional fields: Toggle to automatically include any of five different fields with each submission.
b) Languages
The default language of your form will match that of your workspace, but you are able to translate your form into any language available in your workspace. This allows you to add translations for each of your form's fields and labels.
If you add new languages, switch between languages in the preview pane to view how the form appears in each language. That way you can ensure all translations are accurate and properly formatted.
Changing the default language: If necessary, at any time you can modify your form's default language. This language is the one proposed when no translation has been recorded for a form's fields or labels. Certain closed-ended form results will be automatically displayed in this language, such as a yes or no answer.
Adding a translation: You can add translations for any language available in your workspace.
When you add a language, you are shown a copy of the form with the original default-language text in gray. Simply type over the existing text to add a translation. A progress bar indicates the percentage of fields that have been translated.
You choose the lanuguage you're editing in the dropdown menu in the upper-left. Remember that changes are saved automatically.
If you go somewhere else in your workspace, for example, and wish to continue editing your form's languages, simply return to the Languages setting to be able to edit your different versions.
Note that if you remove a language by accident, simply add that language back, and any translations you previously made will be restored.
c) Actions
These settings define the behavior of several automatic actions.
Notifications: You can choose to have an email notification sent every time a response to the form is submitted. The notification is sent to all users with the "edit_form" permission.
Moderation: Moderation is not enabled by default.
Ending: Customize the action taken upon a form being submitted. Choose between the following:
- Text: Display a personalized thank you message. To modify the message, just click into the box with the default text ("Thank you / The form was submitted successfully").Note that when you select text you're provided with a set of basic formatting tools.
- Page: Redirect users to a specific page from your workspace.
- URL: Redirect users to an external URL.
Your next steps
Now that you've created a form and configured its key settings, including who you want to be able to access it, see this page for how to share it and process its results.