Create and manage your data collection forms
Updated
by Patrick Smith
Once you have access to the Data Collection Form feature and have added admins and moderators in Opendatasoft, you can:
Logging in to your contribuer.io account

Once you've signed up for the feature, you will be given a contribuer.io space. To create and manage your forms, go there and sign in with your Opendatasoft credentials (your contribuer.io site will be https://<your_domain>.contribuer.io).
Building a form
Creating a new form

The creation of a new form is accessible from the My forms screen.
Forms can be built from scratch or created based on an existing dataset. In the latter case, contribuer.io retrieves the data schema and converts each column into a question with an appropriate response format.
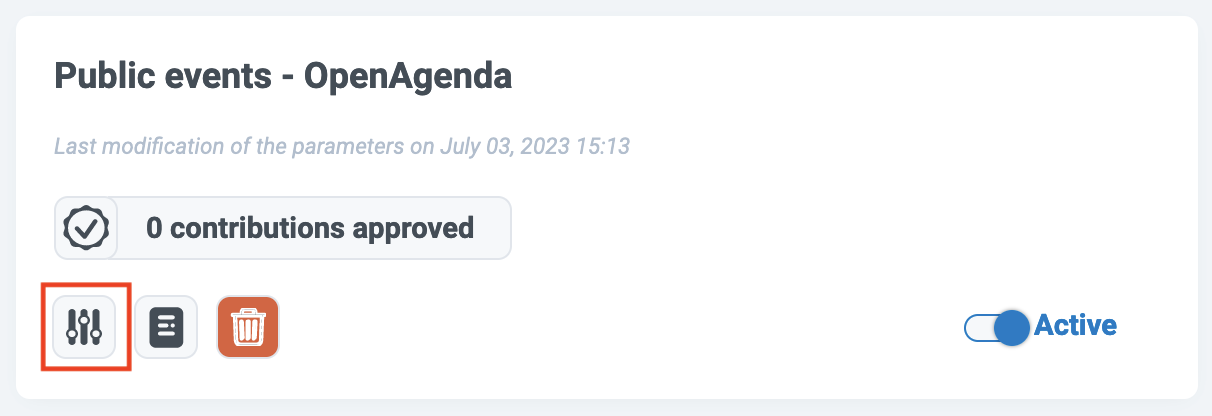
Then, once the new form is created, its configuration is accessible in the Settings screen accessible through the small settings icon on each form (see image above).
Adding or modifying questions
To add a question to a form, in Settings scroll to the very bottom of the screen and click on Create a question.

Question fields
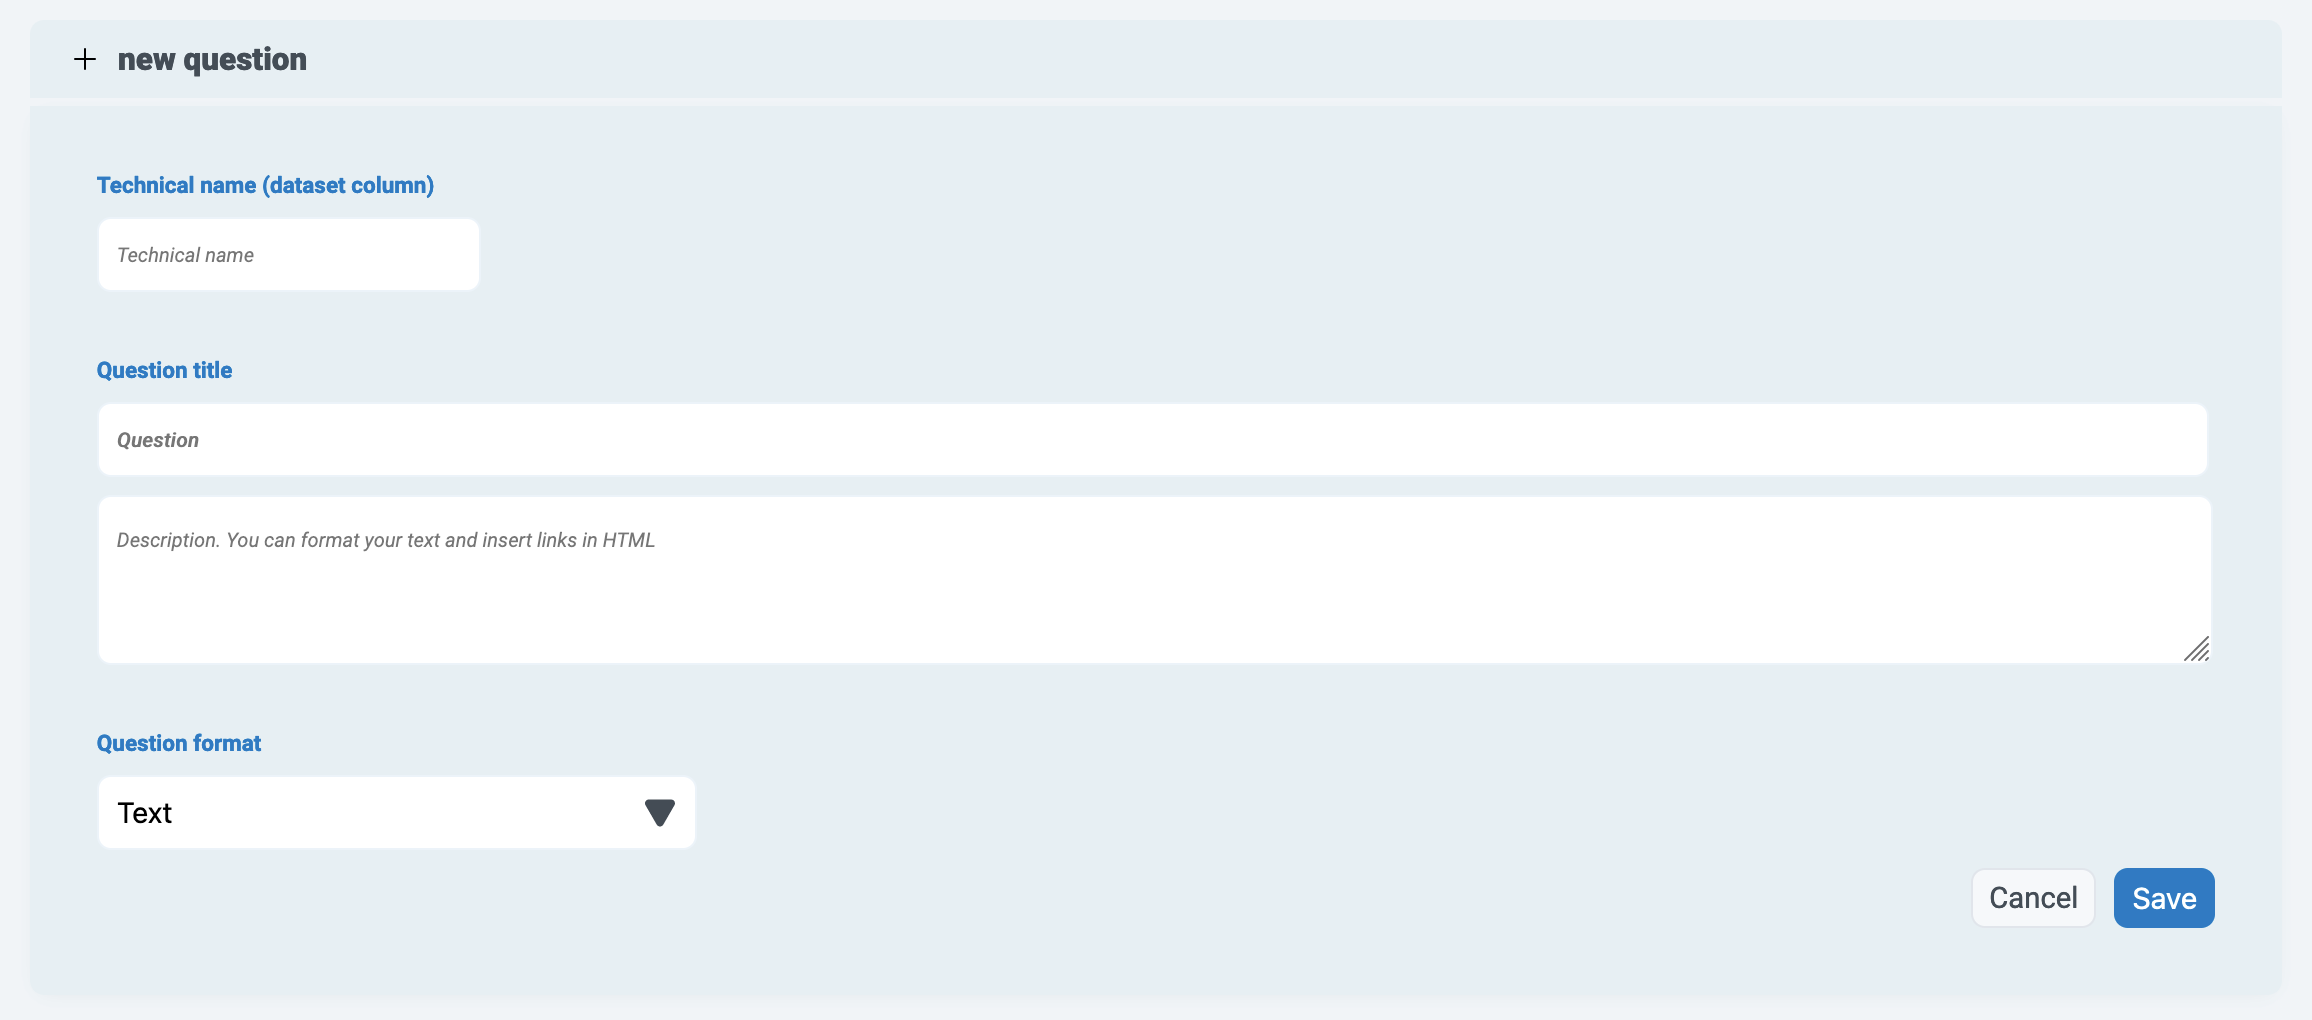
Here are the different fields you can configure when adding a question:
- Technical name: In your draft form, a question's technical name is visible to the far right, and corresponds to the header for the corresponding column of data in your dataset. This name is not visible to contributors who fill out the public form.
Normally these names are created automatically and cannot be modified. But for questions you create manually, you must define the technical name here (the first field in the image above).Note this is visible only when creating the question and, once created, cannot be modified. - Question title and description: The title is the question as you want it to be seen by users. The description can be used to instruct contributors on how to respond appropriately to a question.
- Question format: This allows you to define the type of data expected. Different options are available depending on the format. See the table below for more information.
Click Save once you've filled everything out.
Then, two other aspects of the question can be defined:

- Hidden question: To hide a question, click on the eye icon. A hidden question allows you to keep the column in your dataset (remember, one question = one column in your dataset) without displaying it to the contributor filling out the form. Note that "technical" formats are necessarily hidden. See below for more information.
- Required response: A question can be made mandatory or not by clicking on the star icon.
If you need to edit the question, click on the pencil icon. And of course, if you want to delete the question, click on the trash can icon.
Question formats
These are the formats you can define for each question.
Question format | Description |
Address | Automatically filled out based on the French National Address Database (BAN). Automatically populates other responses with the city, postal code, or INSEE code information. |
Autocomplete from JSON API (Beta) | Automatically filled out based on a JSON file |
Autocomplete from ODS (Beta) | Automatically filled out based on a reference dataset within Opendatasoft |
Date | The date in the DD/MM/YYYY format |
This question format will allow you to send a confirmation email to the contributor with a copy of their responses | |
File | Allows the contributor to upload a file |
GPS point | WGS84 coordinates in the form "latitude, longitude". Displays a map to the contributor. If a question with the "Address" format is present in the form, it allows geolocating it during input. |
Multiple choice | Multiple choice from a list of values, presented as checkboxes |
Number | An integer or decimal number. You can define a minimum and maximum value |
Official town code | A 5-digit code |
Opening Hours (Beta) | Allows the contributor to enter time slots for a day, with one column per day. See also: Schedules. |
Phone | A French phone number in the format 06, 00336, or +336 |
Picture | Allows a contributor to upload an image, for example from a smartphone |
Postal code | A 5-digit code |
SIRET | 9-digit SIRET code |
Schedules (Beta) | Allows entering time slots in a structure with a single column for all days. See also: Opening Hours |
Single choice | The selection of a single value from a list, presented as a drop-down menu or checkboxes |
Tags | Allows the contributor to add tags  |
Text | A single line of text |
Text (long) | A longer text |
URLs | A URL in the form http:// or https:// |
Yes No | A checkbox, for example to request consent. |
Creation timestamp (technical column) | Automatically displays the date when the contribution was made |
Edit link (technical column) | Automatically provides a link to propose modifications |
Fixed value (technical column) | Value pre-filled by the administrator |
Modification timestamp (technical column) | Automatically displays the date the last modification of the contribution occurred |
Unique ID (technical column) | Automatically displays a unique ID. |
Technical format | Description |
Contributor | Automatically returns the user name of the contributor if it is available (otherwise returns "anonymous") |
Creation timestamp | Automatically displays the date when the contribution was made |
Edit link | Automatically provides a link to propose modifications |
Fixed value | Value pre-filled by the administrator |
Modification timestamp | Automatically displays the date the last modification of the contribution occurred |
Unique ID | Automatically displays a unique ID. |
Adding or modifying sections
Questions can be organized into different sections. Each section will then appear as a new page for the user filling out the form.
Adding a section
Sections are visible to the users filling out the form, and can be used to divide up the questions, provide context or instructions, etc.
To create a new section, scroll to the very bottom of the screen and click on Create a section.

Fill out the section's title and description. Note that section descriptions can be formatted using HTML. For example, you can provide a clickable link using a <a href=””>link<a> tag, or bold text with <b>test</b>.
Reordering questions and sections
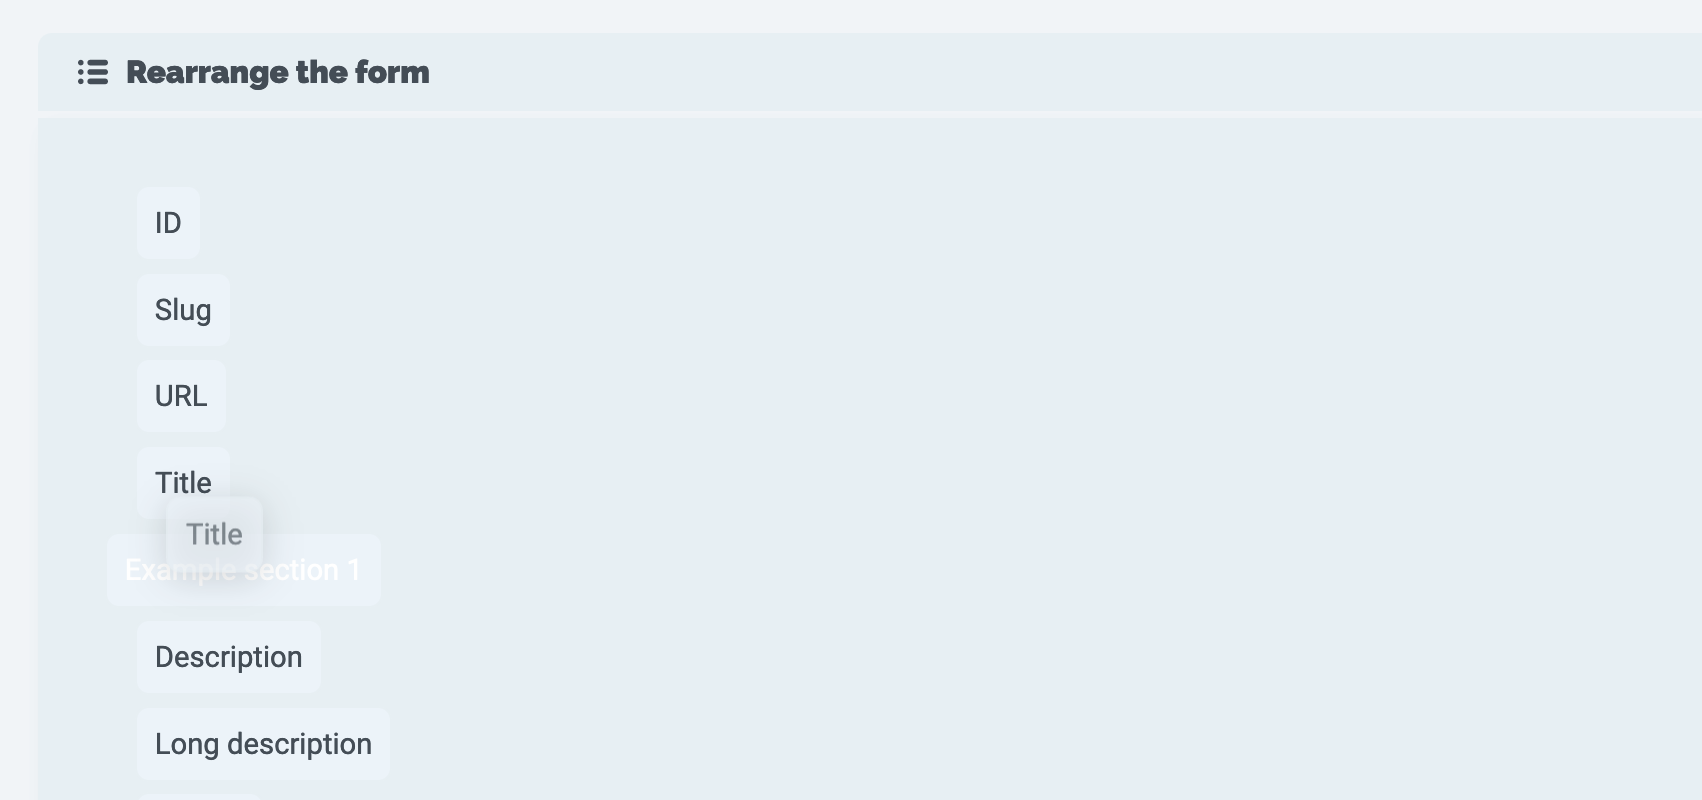
The order of the questions and sections can be managed by clicking on the Rearrange questions button, then dragging and dropping them into the right order.
Customizing your form
Personalization
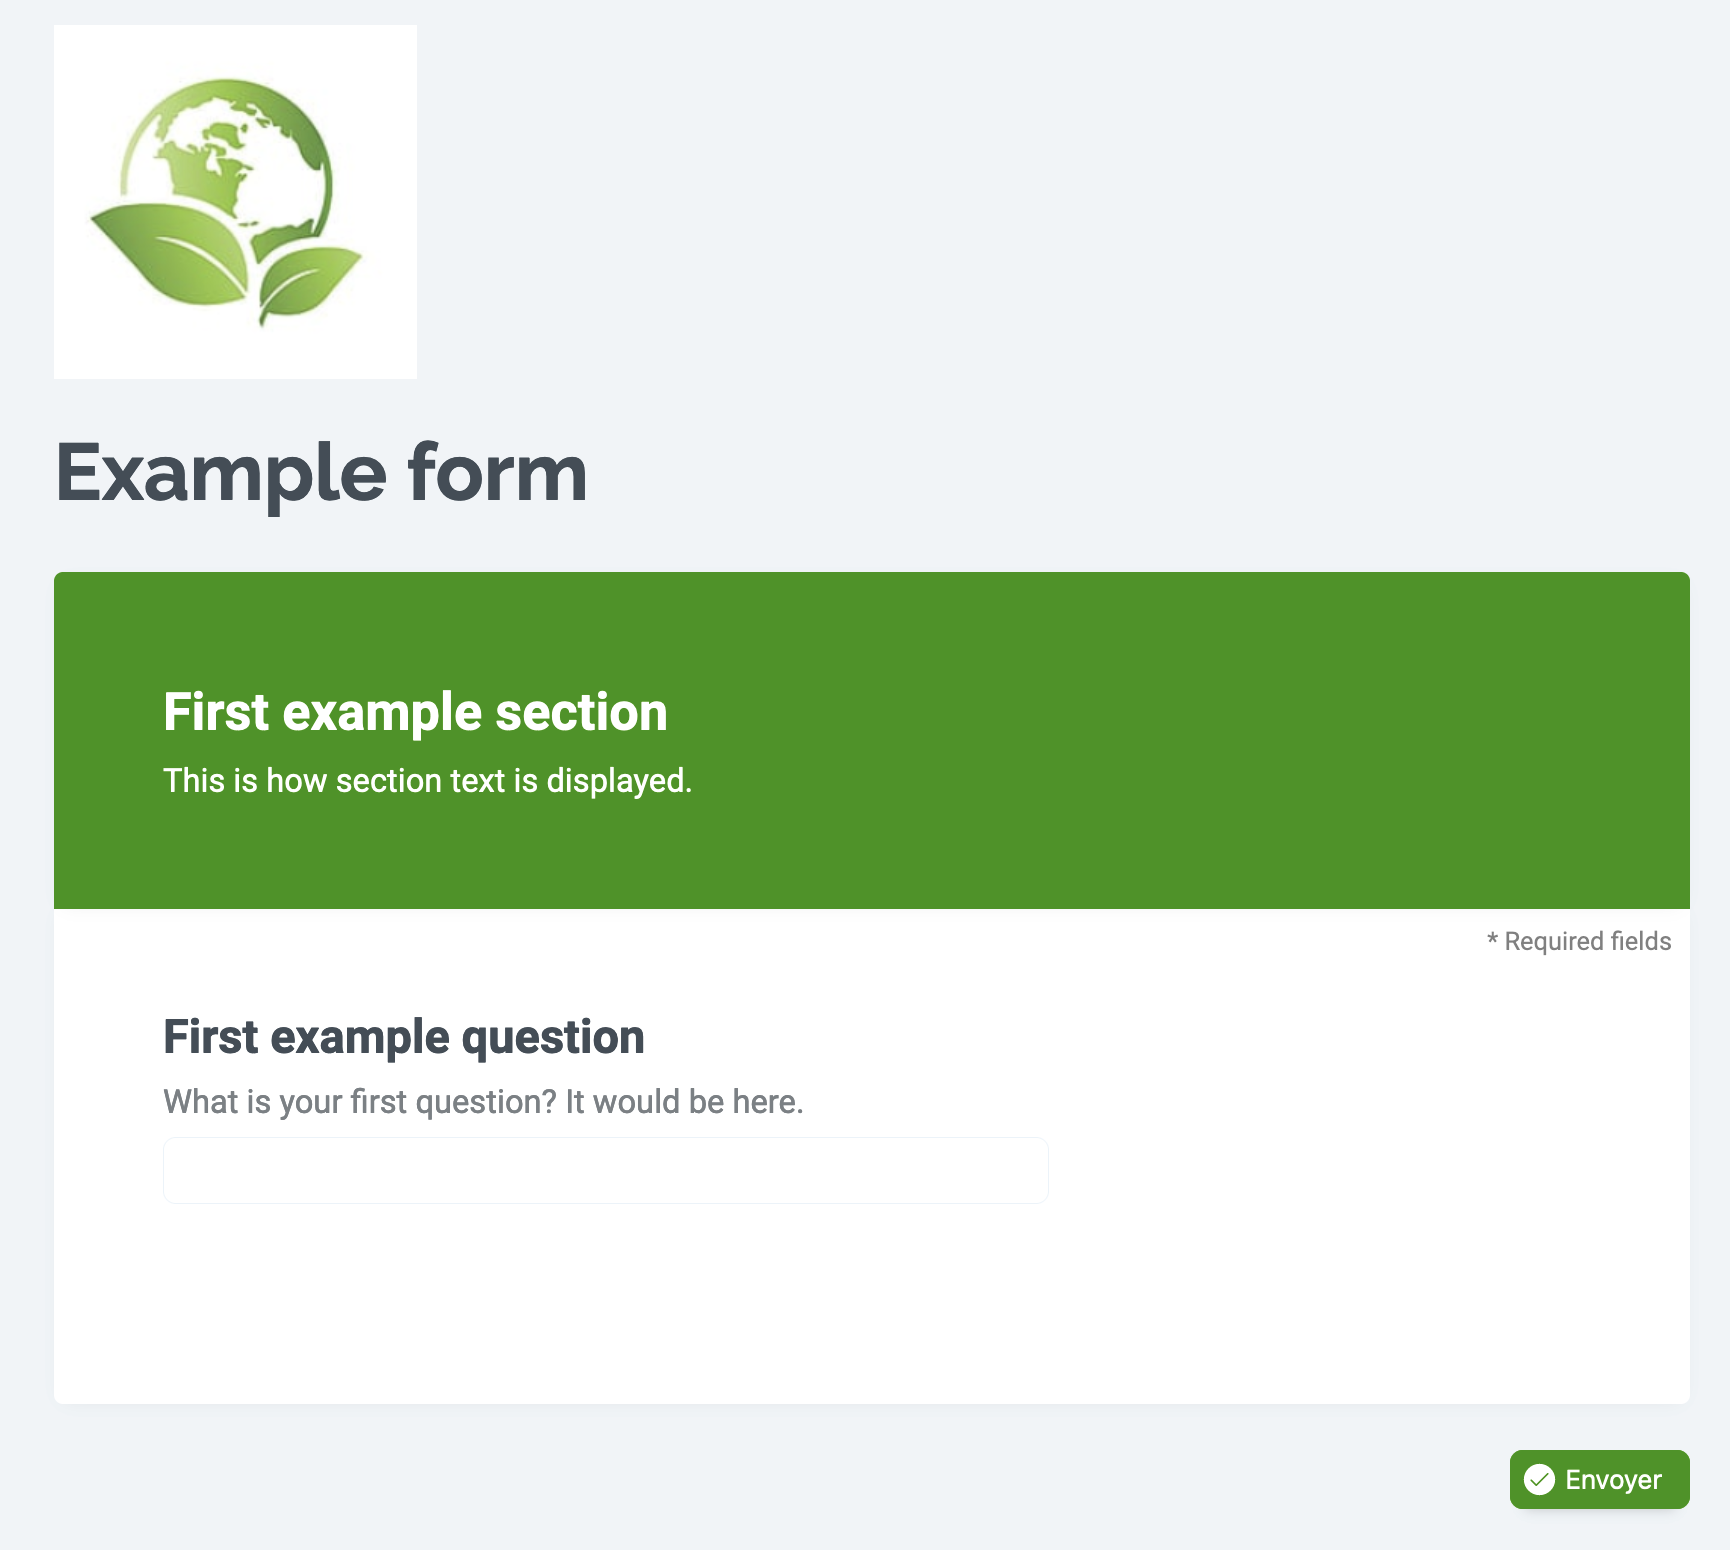
The logo in the form can be customized, as well as the colors used in buttons and sections. Under Settings, click on Logo to add an image, or click on Main color to use the color-picker.
For example, with this icon and color, a form might look something like this:
Save and Restore configuration
Saving a form's "configuration" saves its questions, as well as every other aspect of the form except the logo. Naturally, you can use this to backup specific forms and their questions. Note that you can also use this to duplicate forms to jump-start creating new ones that may share questions or settings.
Submissions
Automatic approval By default, contributions must be moderated before they go into their dataset. This setting allows every contribution to go straight into its corresponding dataset, no moderation required.
Advanced settings
Confirmation message When a contributor submits a form, they are shown a standard confirmation message with the logo you have provided and the following text: "Your contribution has been sent successfully!" Instead, you can define a customized confirmation message. Note that you can include links and format the text using HTML.
Legal Notice This text is included at the bottom of your form, and is for any legal information you may wish to include.
Email notifications You may provide one or more emails, separated by commas, that will receive notification every time the form is submitted.
History and backups This opens a page where you can download a record of the changes made to your form. There is currently no versioning, though remember that you can save a form's configuration anytime you like. However, if you have lost your work, reach out and we may be able to help.
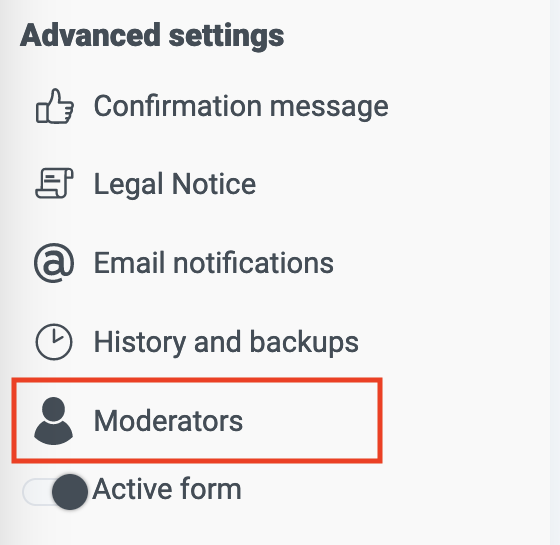
Moderators For more information on moderation, see Adding moderators to your forms below.
Active form By default, any new form is active. However, you can decide to "turn off" any form. For example, once a survey is done you can make sure no more contributions can be made. Note that "inactive" surveys are grayed out and listed separately, below the active forms.

Pre-filling responses

It's possible to provide pre-filled responses to questions by manually appending this instruction to the form's URL.
Add the technical name of the question you want filled, and the value you want pre-filled, according to the following format: ?prefill_<technical_name>=<value>.
In the example image above, note that the technical name of the question is "first_question":

It's also possible to hide specific questions using the same technique: ?hide_<technical_name>=true.
Adding moderators to your forms
Remember that when you designate moderators in Opendatasoft, they are not automatically assigned to any specific forms or contributions.
Once you've created at a form, you can add the appropriate moderators to it.
On your contribuer.io account, click on the settings icon for the form you've created.
Then, under "Advanced settings," click Moderators.
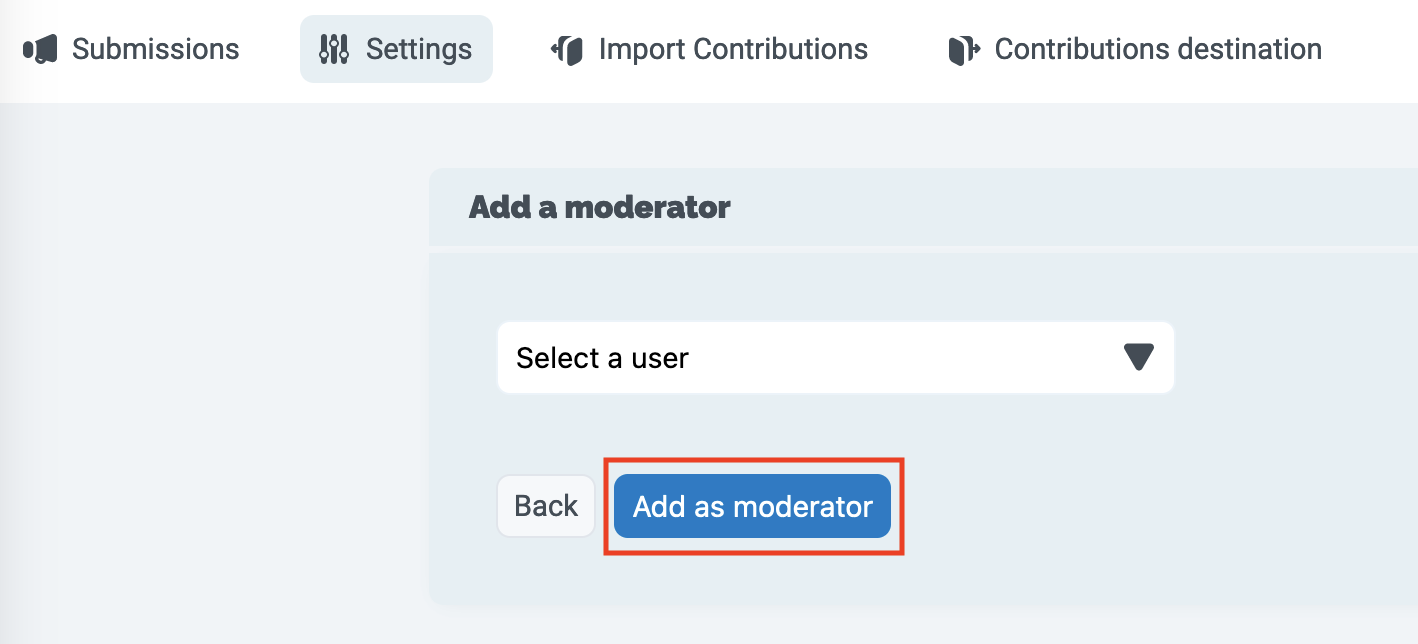
There you can select a user from the dropdown menu and click Add as moderator.
 Getting started
 Exploring and using data
 Publishing data
 Managing your users
 Managing your portal
